A step-by-step Azure lab for creating, versioning, and deploying standardized VM images at scale.
Why Golden Images Matter in Real Azure Environments
Inconsistent virtual machine builds introduce operational risk, slow down deployments, and make security compliance harder to enforce. When virtual machines are configured manually, one click at a time in the Azure Portal, differences inevitably appear between environments. These differences are known as configuration drift, and they are one of the most common root causes of outages, failed audits, and unreliable deployments.
Wording improvement
Original: “Inconsistent virtual machine builds introduce risk, slow down deployments, and complicate security compliance.”
Improved: Inconsistent virtual machine builds introduce operational risk, increase deployment time, and make security and compliance controls difficult to enforce at scale.
In enterprise Azure environments, virtual machines must be predictable, repeatable, and governed. Security teams expect the same baseline configuration everywhere. Operations teams want fast, reliable provisioning. Cloud engineers need a way to scale without rebuilding servers from scratch every time.
This is where Azure Compute Gallery and golden images become critical.
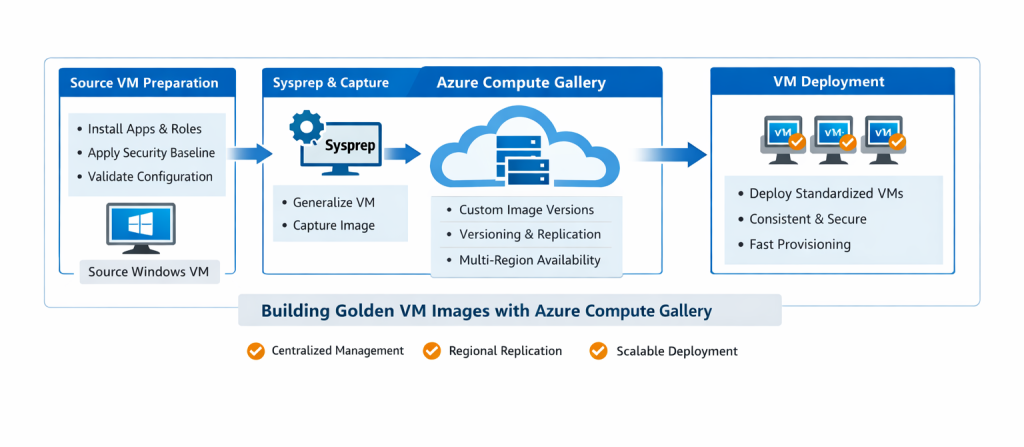
A golden image is a preconfigured, hardened virtual machine image that serves as the trusted baseline for all future deployments. Instead of manually configuring every VM, teams build the configuration once, capture it, and deploy it consistently across environments and regions.
In this hands-on lab, you will learn how to create, version, and deploy golden images using Azure Compute Gallery, the same approach used in real production Azure environments.
What Is Azure Compute Gallery?
Azure Compute Gallery (formerly Shared Image Gallery) is a service that allows you to centrally manage, version, and distribute custom VM images across subscriptions, resource groups, and Azure regions.
It enables you to:
-
Store standardized VM images centrally
-
Version images over time (v1.0.0, v1.1.0, etc.)
-
Replicate images automatically to multiple regions
-
Deploy VMs at scale using a consistent baseline
Compute Gallery fits naturally into a broader Azure governance strategy alongside Azure Policy, tags, and resource locks.
👉 Related guide: Azure Policy, Tags, and Resource Locks Explained: A Complete Governance Guide for Cloud Engineers
🎥 Video Walkthrough
Lab Objectives
By the end of this lab, you will be able to:
-
Prepare a Windows Server VM for image capture
-
Generalize a VM using Sysprep correctly
-
Create and publish a custom image to Azure Compute Gallery
-
Enable image versioning and regional replication
-
Deploy new virtual machines from a golden image
-
Understand real-world enterprise use cases for image standardization
Each step mirrors how golden images are created and maintained in production Azure environments.
Lab Environment Overview
The lab environment consists of:
-
One Windows Server virtual machine (source VM)
-
Preinstalled applications and server roles (for example, IIS)
-
Security hardening applied to the OS
-
Azure Compute Gallery
-
Custom image definition with versioning enabled
-
One or more new VMs deployed from the golden image
This environment intentionally reflects a real enterprise baseline VM, not a minimal demo build.
Step 1: Preconfigure the Source Windows VM
Before capturing an image, the source virtual machine must be fully prepared. Whatever exists on this VM will be copied into every future deployment, so this step is critical.
Typical preparation tasks include:
-
Installing required applications and tools
-
Enabling Windows Server roles and features (for example, IIS)
-
Applying OS hardening and security baselines
-
Removing temporary files and unused software
-
Validating system configuration and stability
Wording improvement
Original: “Before capturing an image, the source VM is fully prepared.”
Improved: Before capturing an image, the source VM must be carefully prepared to represent the exact baseline you want every future virtual machine to inherit.
In production environments, this stage often aligns with security and compliance requirements. For example, hardened images may enforce firewall rules, disable unnecessary services, and apply organization-approved configurations.
This approach works best when combined with consistent network design and segmentation, ensuring that deployed VMs land in properly structured subnets.
👉 Related lab: Setting Up Clean Azure VNets, Subnets & Tagging
Step 2: Generalize the VM Using Sysprep
Virtual machines contain machine-specific information such as:
-
Computer name
-
Security identifiers (SIDs)
-
User profiles and unique OS state
To make the VM reusable, this information must be removed before image capture. On Windows, this is done using Sysprep.
Sysprep performs the following actions:
-
Resets the operating system to a clean state
-
Removes unique identifiers
-
Prepares the OS for cloning and redeployment
After Sysprep completes, the VM is shut down and cannot be restarted. This is expected behavior and indicates that the VM is ready for image capture.
Wording improvement
Original: “After completion, the VM is safely ready for image capture.”
Improved: Once Sysprep completes and the VM is shut down, it is in a clean, generalized state and ready for image capture.
Skipping or incorrectly performing this step is a common mistake and leads to deployment failures or duplicate system identifiers.
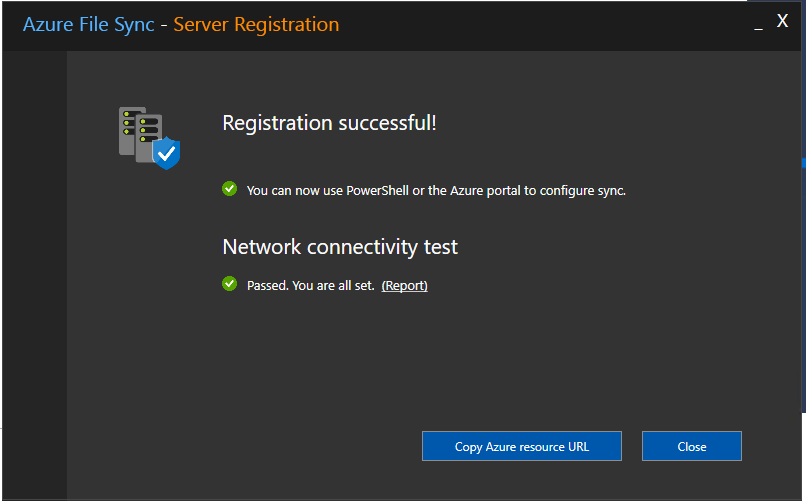
Step 3: Capture and Publish the Image to Azure Compute Gallery
With the VM generalized, the next step is to capture and publish it to the Azure Compute Gallery.
This process involves:
-
Creating an image definition (OS type, publisher, offer, SKU)
-
Publishing a new image version
-
Enabling versioning for future updates
-
Configuring regional replication
-
Making the image available for enterprise use
Wording improvement
Original: “This step transforms a single VM into a scalable deployment asset.”
Improved: This step transforms a single, manually configured VM into a centrally managed, versioned, and scalable deployment asset.
Versioning is especially important in real environments. When security patches or configuration changes are required, a new image version is published instead of modifying existing VMs in place.
This practice aligns well with infrastructure-as-code workflows, especially when combined with Bicep-based deployments.
👉 Related lab: Automating Azure Infrastructure with Bicep: A Hands-On IaC Lab Using VS Code
Step 4: Enable Regional Replication and Governance
Azure Compute Gallery allows images to be replicated automatically to multiple regions. This ensures:
-
Faster VM deployment times
-
Improved resilience and availability
-
Support for multi-region architectures
In enterprise setups, image usage is often governed using Azure Policy to ensure only approved images are deployed.
👉 Related guide: Azure Policy, Tags, and Resource Locks Explained: A Complete Governance Guide for Cloud Engineers
Monitoring image-based deployments and VM health can also be integrated with Azure Monitor for operational visibility.
👉 Related guide: How to Set Up Azure Monitor Alerts, Action Groups, and Processing Rules (Step-by-Step Guide)
Step 5: Deploy New VMs from the Golden Image
Once the image is published, deploying new virtual machines becomes fast and consistent.
When deploying from the gallery:
-
Every VM is built from the same baseline
-
Applications and roles are already installed
-
Security configurations are identical
-
Provisioning time is significantly reduced
This is especially powerful when combined with scalable deployment patterns such as load-balanced environments or VM scale sets.
👉 Related lab: Deploying a Scalable Azure Environment with Bicep: VMs, NSGs, Subnets & Load Balancer (Step-by-Step Lab)
Networking consistency is equally important, particularly in multi-VNet or peered environments.
👉 Related lab: Azure Networking with PowerShell: VNet Design, Peering, VM Provisioning & Network Watcher (Beginner to Pro)
Why Azure Compute Gallery Is Foundational in Enterprise Azure
Azure Compute Gallery solves several real-world challenges:
-
Consistency: Every VM uses the same hardened baseline
-
Security & Compliance: Images align with organizational standards
-
Scalability: Deploy across teams and regions quickly
-
Efficiency: Eliminate repetitive manual builds
-
Governance: Control which images can be deployed
In mature Azure environments, golden images are often paired with secure infrastructure deployments and locked-down networking.
👉 Related lab: Build a Secure Azure Environment in Minutes with Bicep: VMs, Networking, Private Endpoints & Blob Replication
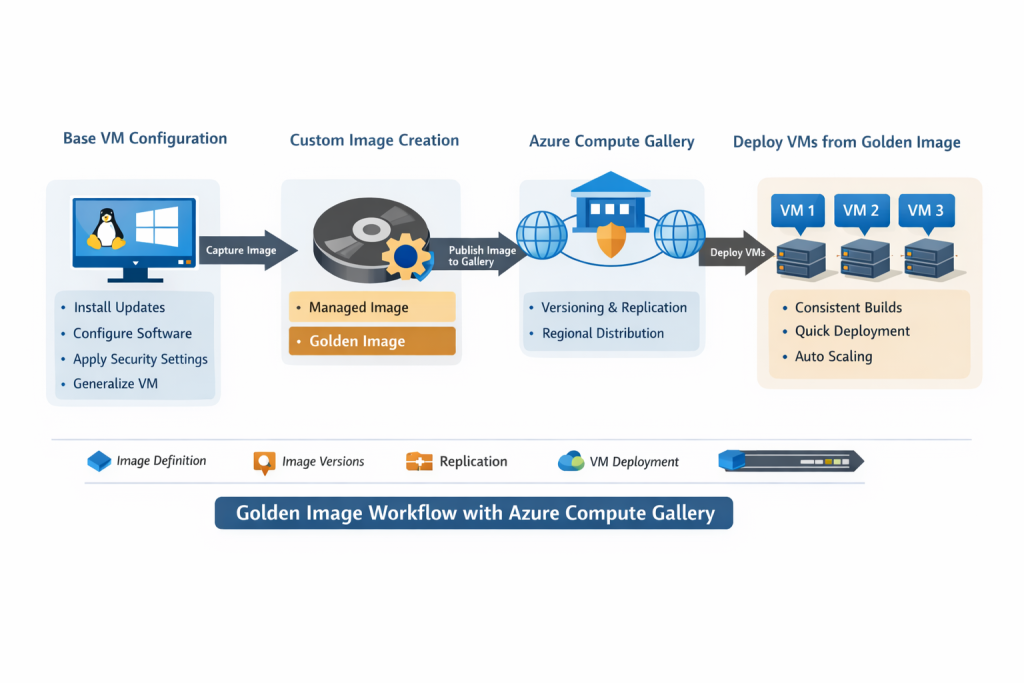
Image Lifecycle Management: Versioning, Deprecation, and Cleanup (Best Practices)
Creating a golden image is only the first step. In real Azure environments, the long-term success of image standardization depends on proper lifecycle management. Without clear versioning, deprecation, and cleanup practices, image galleries can quickly become cluttered, confusing, and risky.
Azure Compute Gallery provides built-in capabilities to manage image lifecycles safely when used correctly.
Why Image Lifecycle Management Matters
Golden images are living assets. Over time, they must be updated to account for:
-
Operating system patches
-
Security baseline changes
-
Application upgrades
-
Compliance requirements
-
Performance optimizations
If older images remain unmanaged, teams risk deploying outdated or insecure VM baselines.
Key principle:
Never update an existing image version. Always create a new one.
Image Versioning Best Practices
Azure Compute Gallery supports semantic-style versioning (for example, 1.0.0, 1.1.0, 2.0.0). This enables controlled rollout and rollback strategies.
Recommended approach:
-
Increment the image version for every change
-
OS patching
-
Security configuration updates
-
Application changes
-
-
Treat image versions as immutable artifacts
-
Document what changed in each version (patch level, config updates)
Example versioning strategy:
-
1.0.0→ Initial baseline image -
1.1.0→ Monthly OS patching -
2.0.0→ Major configuration or application change
This mirrors software release practices and aligns well with infrastructure-as-code workflows.
👉 Related lab: Automating Azure Infrastructure with Bicep: A Hands-On IaC Lab Using VS Code
Deprecating Old Image Versions Safely
As new image versions are introduced, older ones should be deprecated, not immediately deleted.
Deprecation ensures:
-
Existing workloads continue running safely
-
New deployments are guided toward approved versions
-
Teams avoid accidental usage of outdated images
Best practices for deprecation:
-
Stop using older versions in deployment pipelines
-
Restrict access using governance controls
-
Clearly document which versions are deprecated
-
Communicate deprecation timelines to teams
In enterprise environments, Azure Policy can be used to prevent deployments from deprecated images.
👉 Related guide: Azure Policy, Tags, and Resource Locks Explained: A Complete Governance Guide for Cloud Engineers
Cleaning Up Unused Image Versions
Over time, image galleries accumulate unused versions that consume storage and add operational noise.
Before deleting any image version, verify:
-
No active VMs are using the image
-
No automation pipelines reference the version
-
The image is no longer required for rollback scenarios
Safe cleanup workflow:
-
Identify unused or deprecated image versions
-
Confirm zero VM dependencies
-
Remove regional replicas first (if applicable)
-
Delete the image version from the gallery
This keeps the gallery clean, reduces cost, and simplifies image selection for engineers.
Automating Image Governance and Visibility
Image lifecycle management becomes far more effective when combined with monitoring and governance.
Recommended controls include:
-
Azure Policy to restrict approved images
-
Consistent tagging for image versions (e.g.,
Environment,PatchLevel,Approved) -
Monitoring image usage and VM deployments
Operational visibility can be enhanced using Azure Monitor and alerting.
👉 Related guide: How to Set Up Azure Monitor Alerts, Action Groups, and Processing Rules (Step-by-Step Guide)
Real-World Enterprise Pattern
In mature Azure environments, the image lifecycle typically follows this pattern:
-
Build and harden source VM
-
Publish new image version
-
Update deployment templates to reference the new version
-
Deprecate older versions
-
Monitor adoption
-
Clean up unused versions on a defined schedule
This approach ensures security, consistency, and scalability without breaking running workloads.
Final Takeaway on Image Lifecycle Management
Golden images are not “set and forget” assets.
Proper versioning, controlled deprecation, and regular cleanup ensure that Azure Compute Gallery remains:
-
Secure
-
Predictable
-
Easy to operate
-
Enterprise-ready
When managed correctly, image lifecycle practices turn Azure Compute Gallery into a foundational pillar of reliable cloud operations, not just a storage location for VM images.
Key Takeaway
Standardized VM images are no longer optional in modern cloud environments.
By using Azure Compute Gallery, teams can:
-
Enforce consistency across environments
-
Reduce configuration drift
-
Improve security posture
-
Scale deployments confidently
-
Accelerate provisioning without sacrificing control
Golden images form the foundation for reliable, secure, and scalable Azure infrastructure, and this lab demonstrates how to build that foundation correctly.
Discover more from Humble Cloud Tech
Subscribe to get the latest posts sent to your email.