Step-by-Step Guide: Creating a Client Computer and Joining It to a Domain (Hyper-V Lab Setup)

5 min read

As part of building a realistic domain-based environment, this lab demonstrates how to create a client computer and join it to an existing Active Directory Domain Services (AD DS) domain hosted on Windows Server 2019, using Hyper-V.

A domain environment is incomplete without client machines. Joining a client computer allows you to validate authentication, Group Policy processing, and centralized identity management, just as in real enterprise networks.

Lab Prerequisites

Before starting this lab, ensure the following are already configured:

  • A functioning Domain Controller running Windows Server 2019

  • AD DS and DNS installed and operational

  • Hyper-V virtual networking configured

  • Domain administrator credentials available

Lab Objective

To deploy a Windows client virtual machine, configure networking correctly, and join the client to the Active Directory domain.

Step-by-Step Lab Tasks

Step 1: Create the Client Virtual Machine

  • Create a new virtual machine in Hyper-V

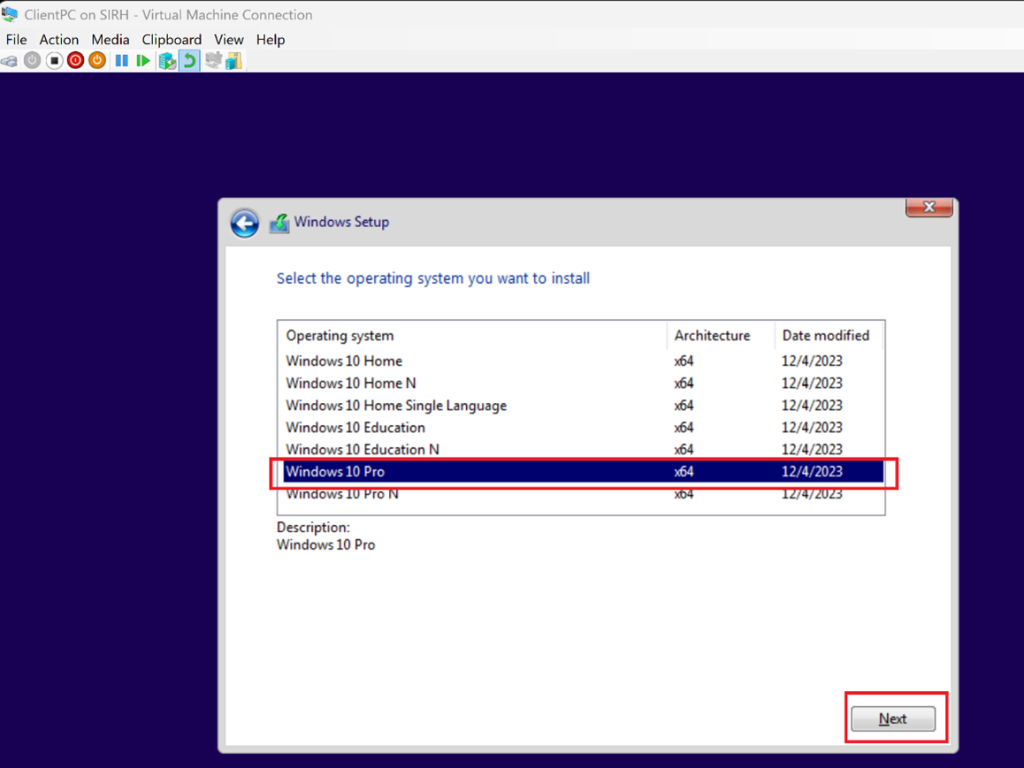
  • Install Windows 10 (Pro or Enterprise edition)

  • Assign the VM to the same virtual switch used by the Domain Controller

💡 Domain join requires network connectivity to the DC.

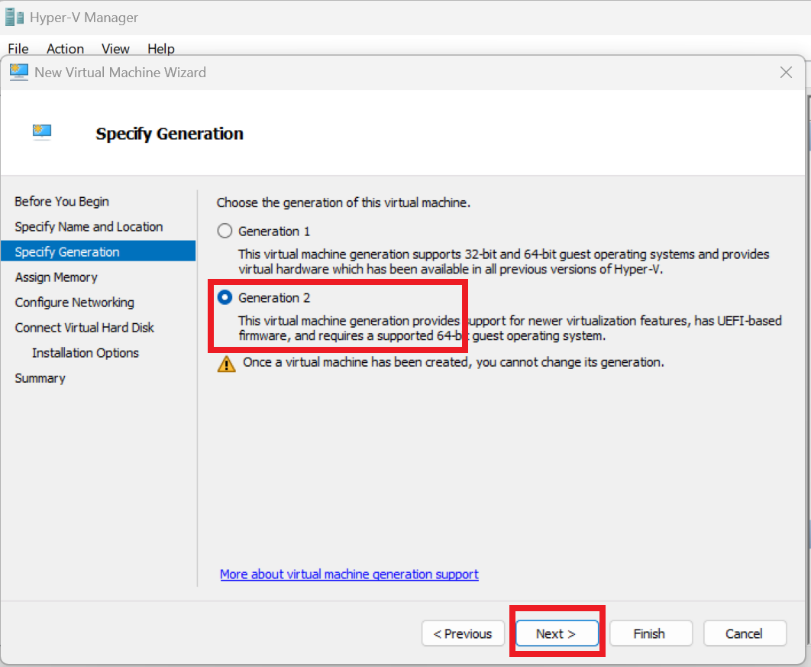
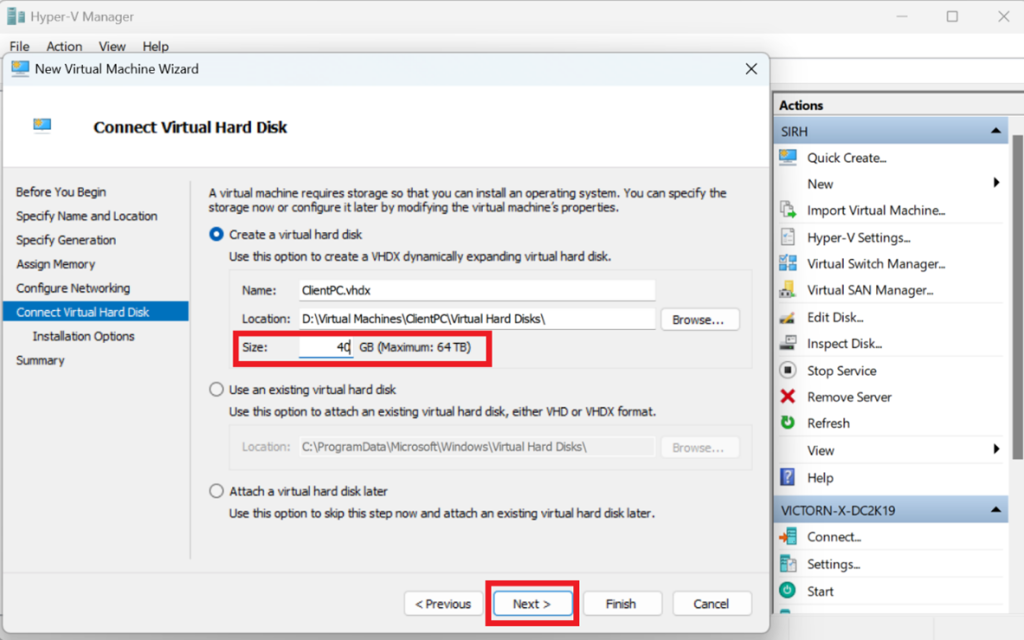
In Hyper-V Manager: Right-click on your host → NewVirtual Machine → Name your VM (e.g., “ClientPC”) → Choose Generation 2

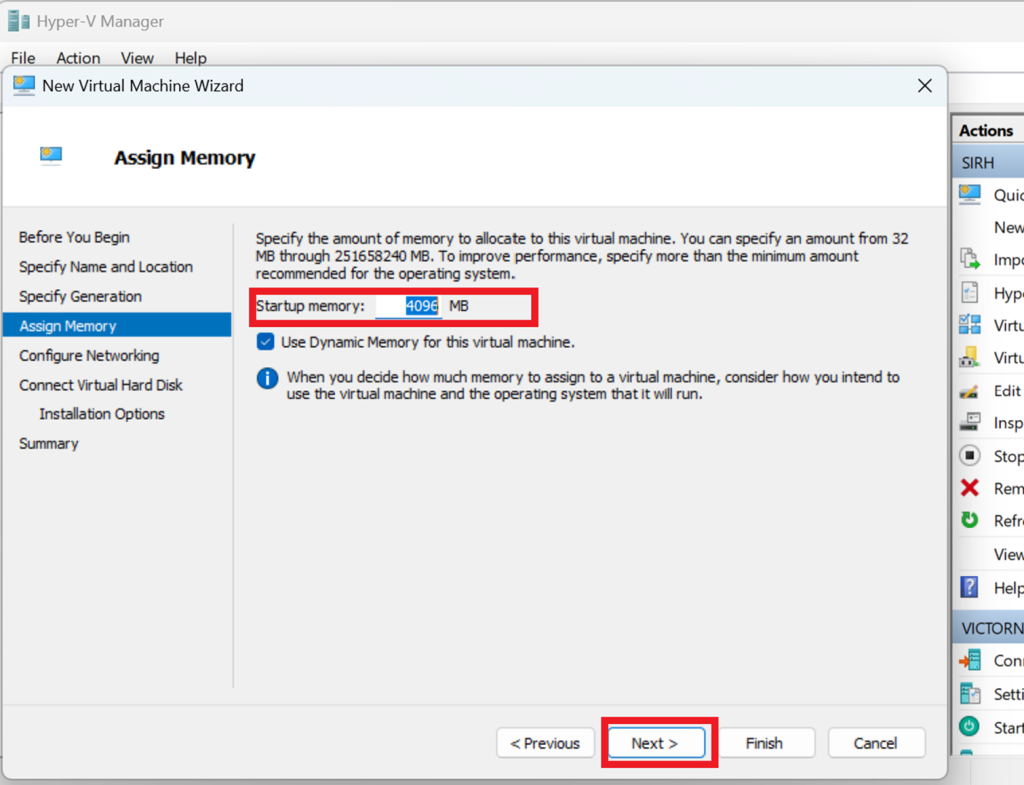
→ Assign Memory (start with 4 GB or more, depending on the Host Machine RAM)

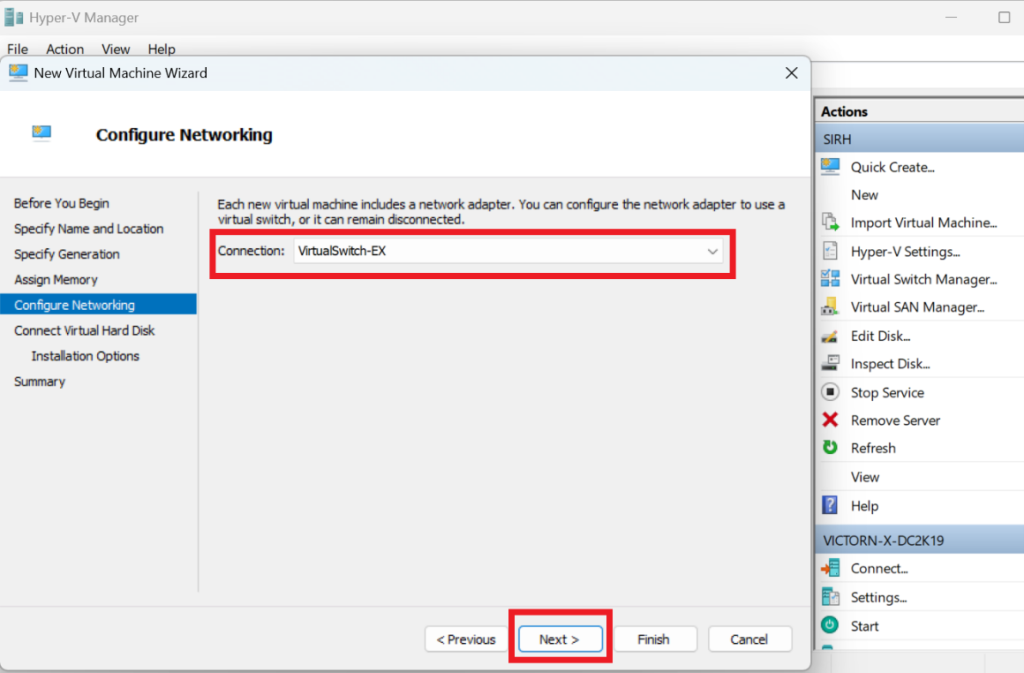
→ Select and connect it to the same virtual switch as the Domain Controller for network visibility.

→ Create a new virtual hard disk (e.g., 40GB or more) → choose and install a Windows 10 ISO

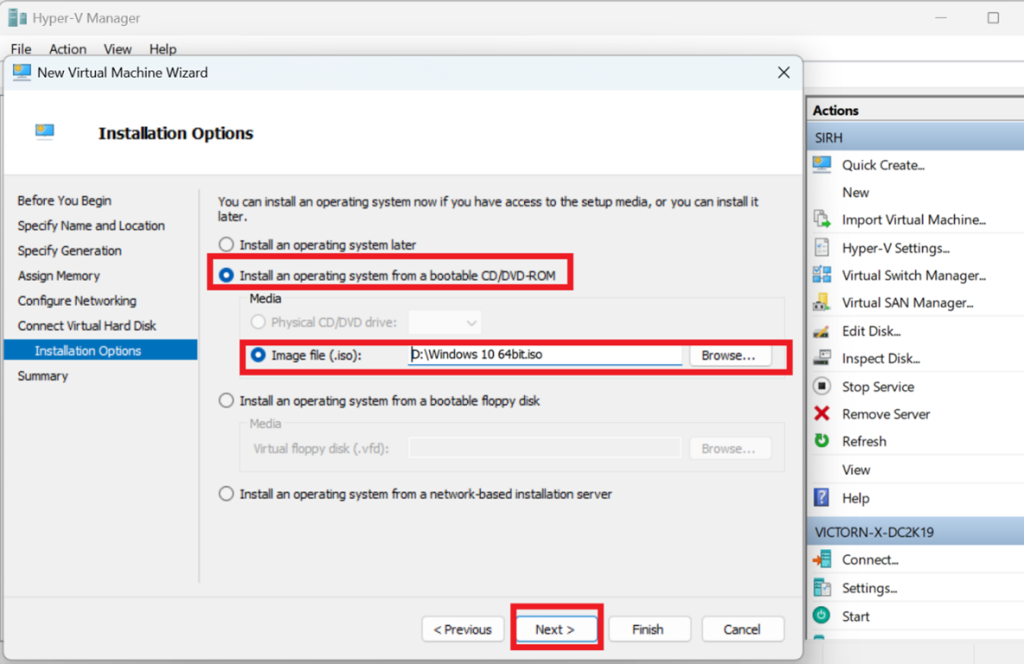
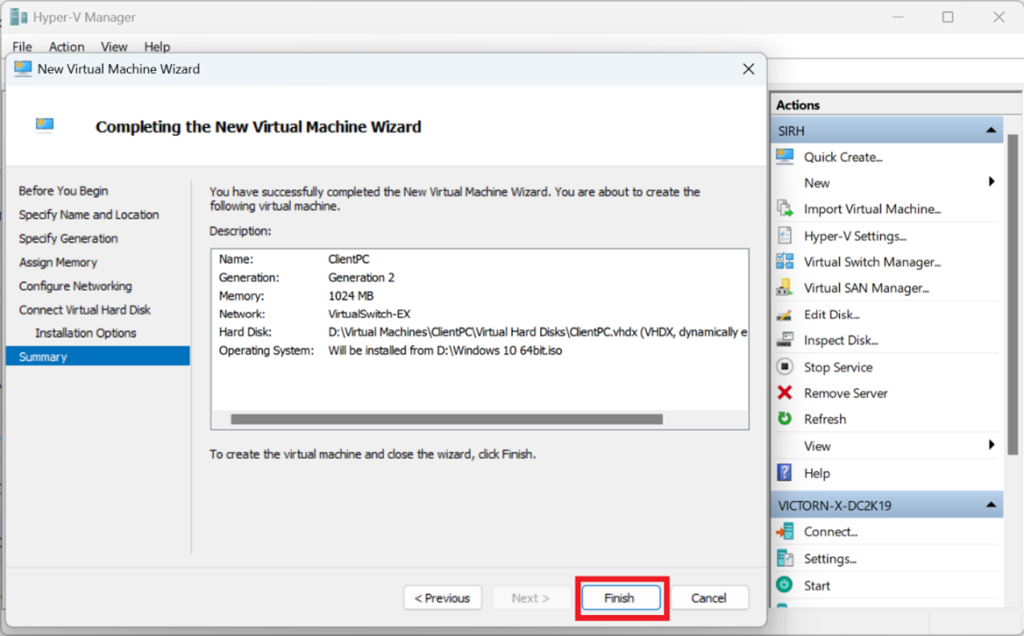
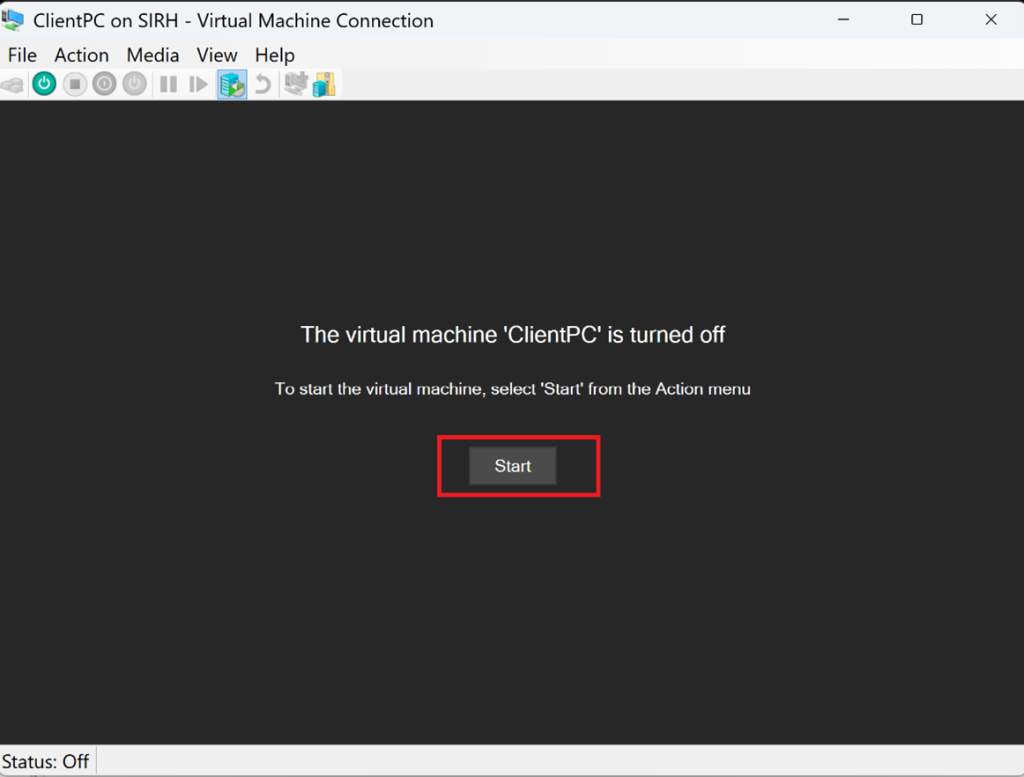
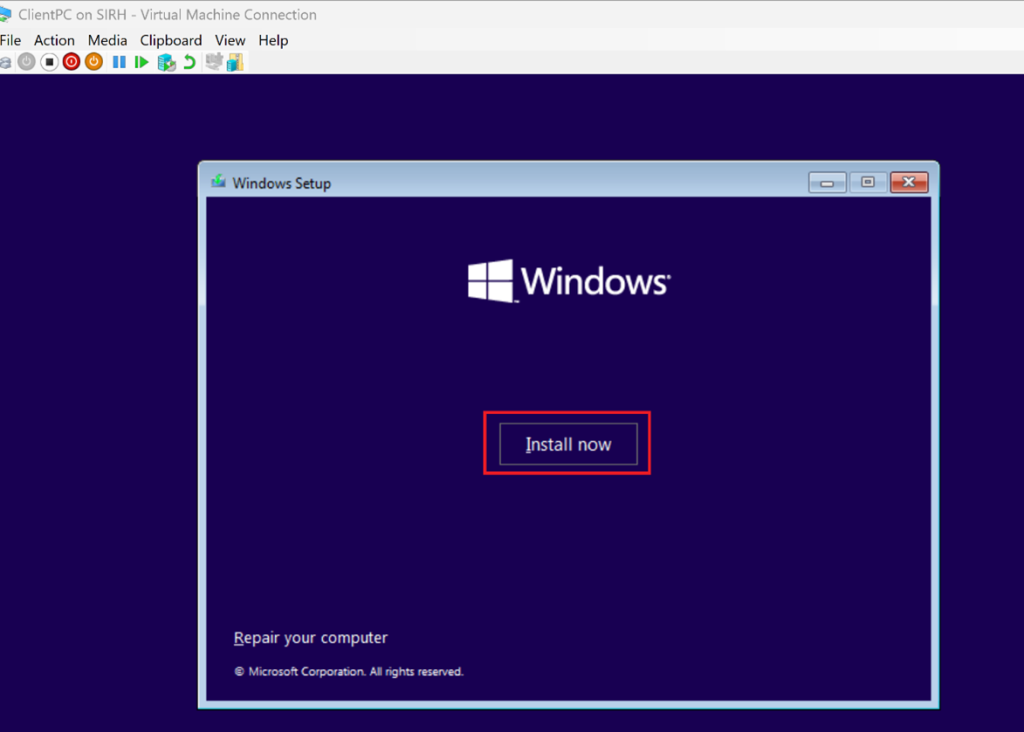
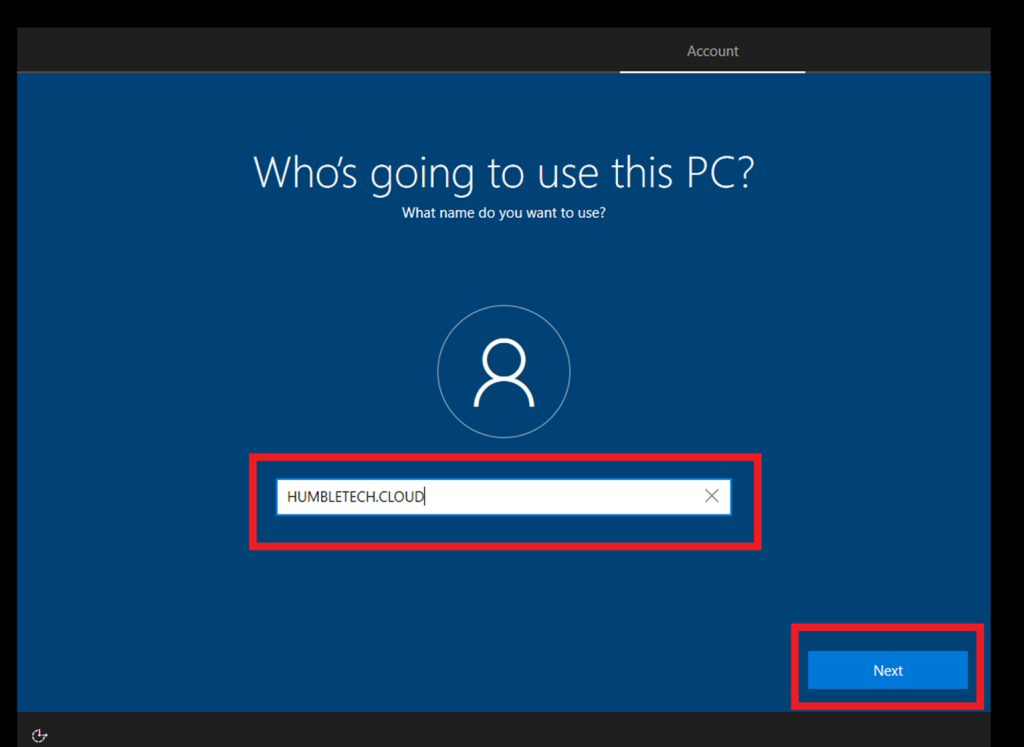
Start the VM → Open the console → Follow the Windows setup wizard

(Choose edition, set password, etc.)

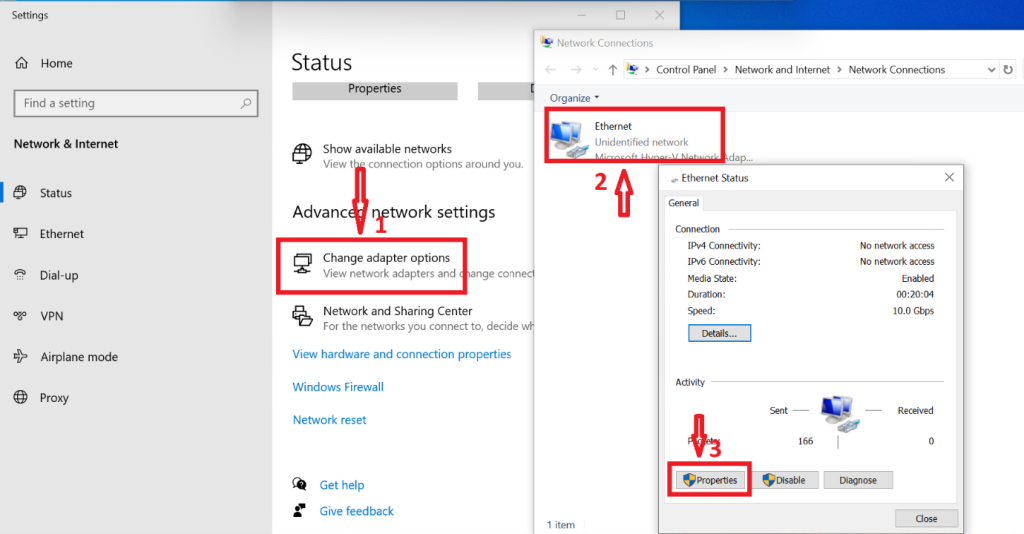
Step 2: Configure Network Settings

  • Assign a static IP address (recommended for lab stability)

  • Configure DNS to point to the Domain Controller’s IP address

💡 Incorrect DNS configuration is the most common cause of domain join failures.

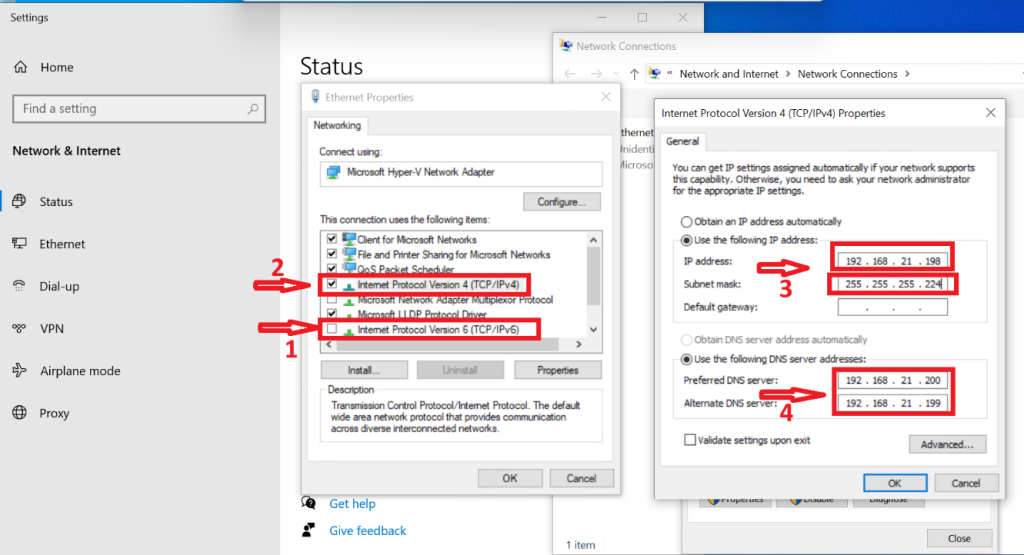
Untick Ipv6 → Double-click on Ipv4 → Set a static IP address

Configured DNS to point to the Domain Controller’s IP address (e.g., 192.168.21.200)

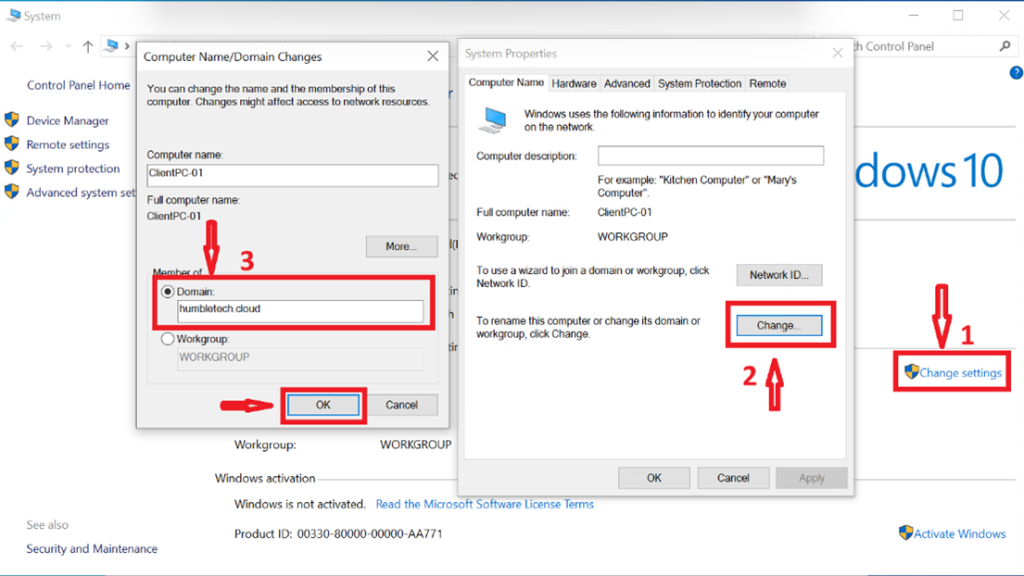
Step 3: Join the Client to the Domain

  • Join the client computer to the existing Active Directory domain

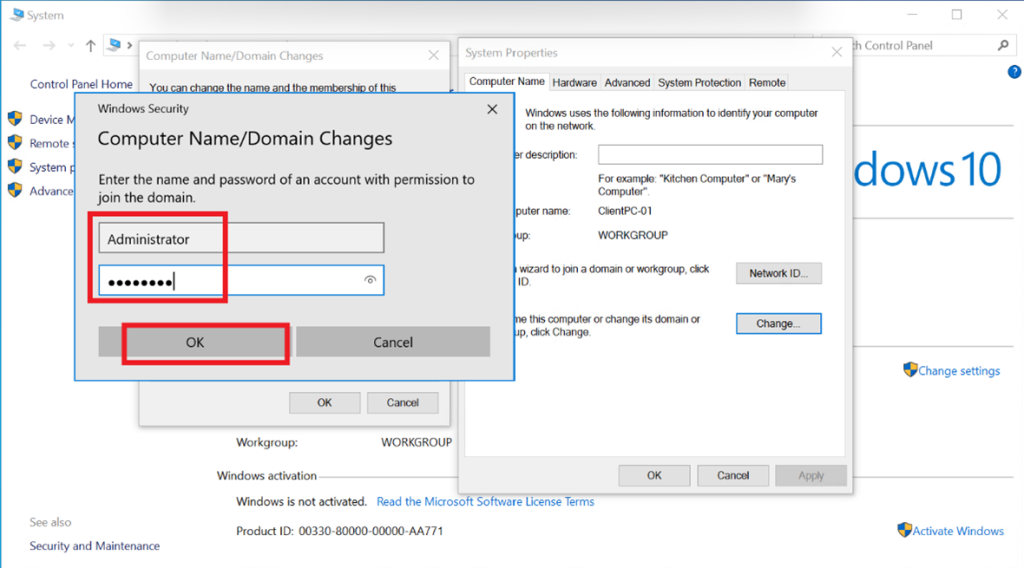
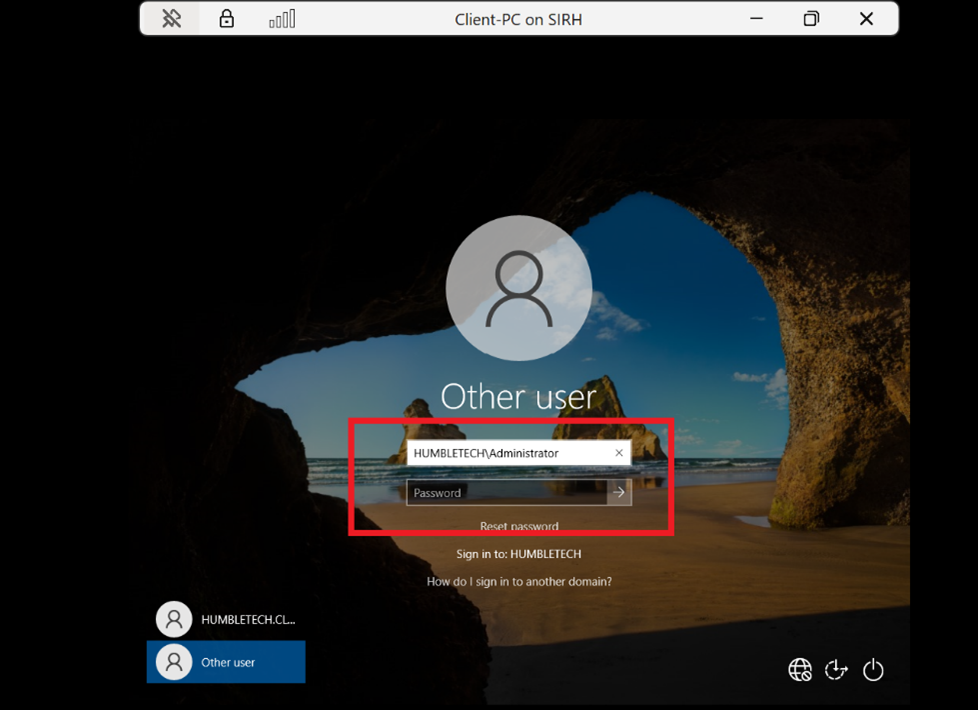
  • Authenticate using domain administrator credentials

  • Restart the client system when prompted

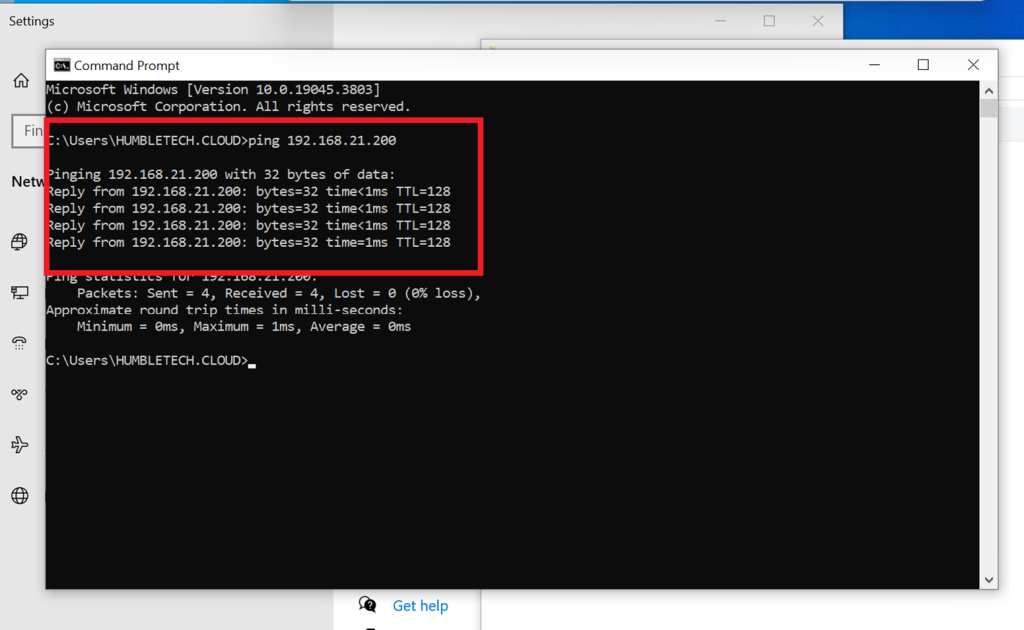
Ping the DNS IP address to contact the server

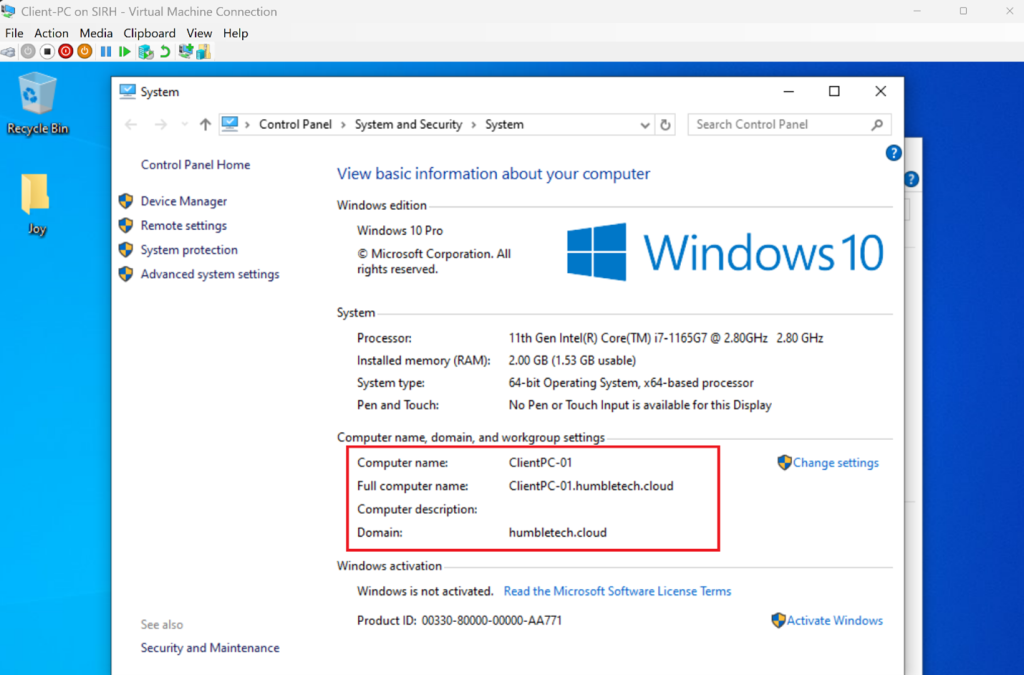
Opened System Settings → Changed PC name (ClientPC-01)

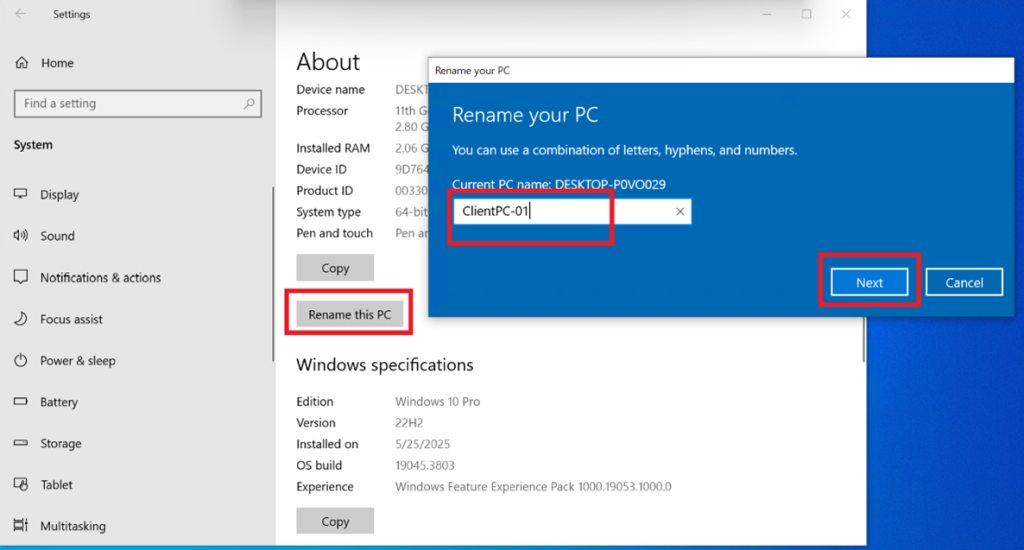
→ Selected Domain and entered Domain (humbletech.cloud)

→ Authenticated using Domain Admin credentials

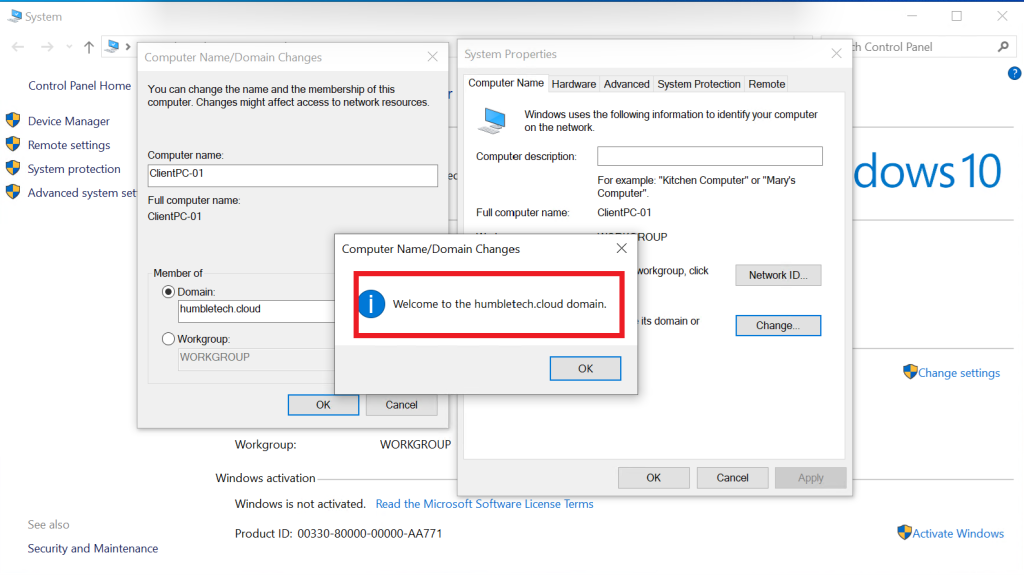
→ You will see a Message “Welcome to the (humbletech.cloud) Domain”

→ Restarted the VM

Step 4: Verify Domain Membership

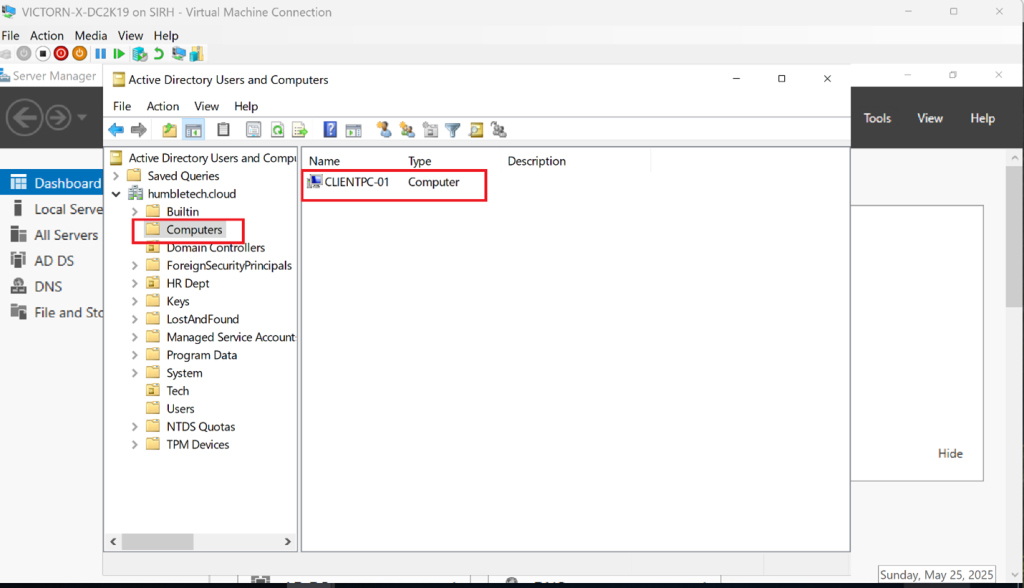
  • Confirm the computer account appears in Active Directory Users and Computers

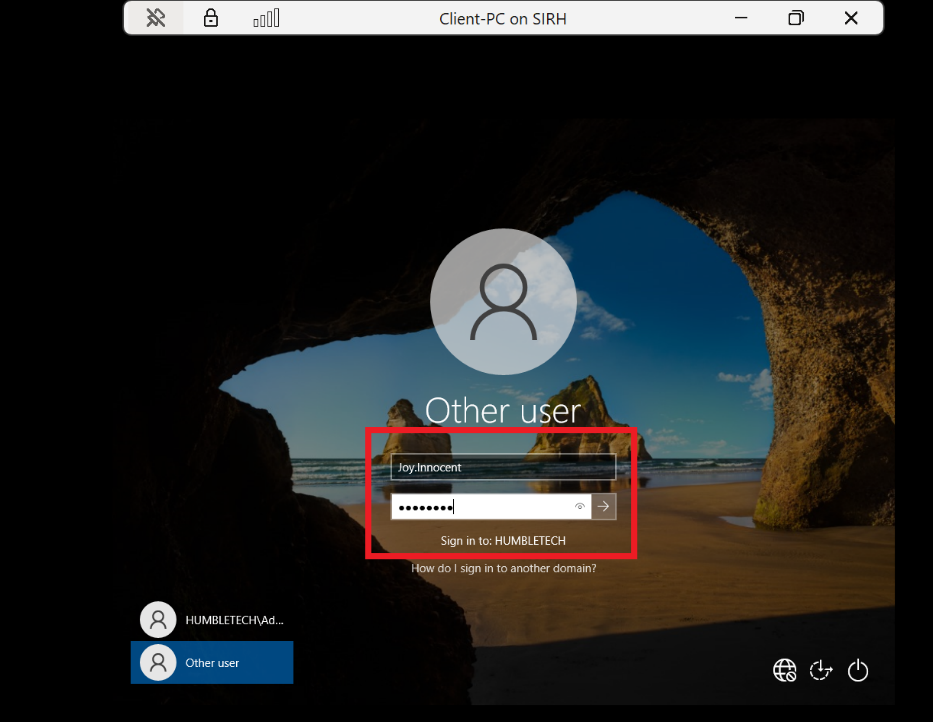
  • Validate successful domain logon using a domain user account

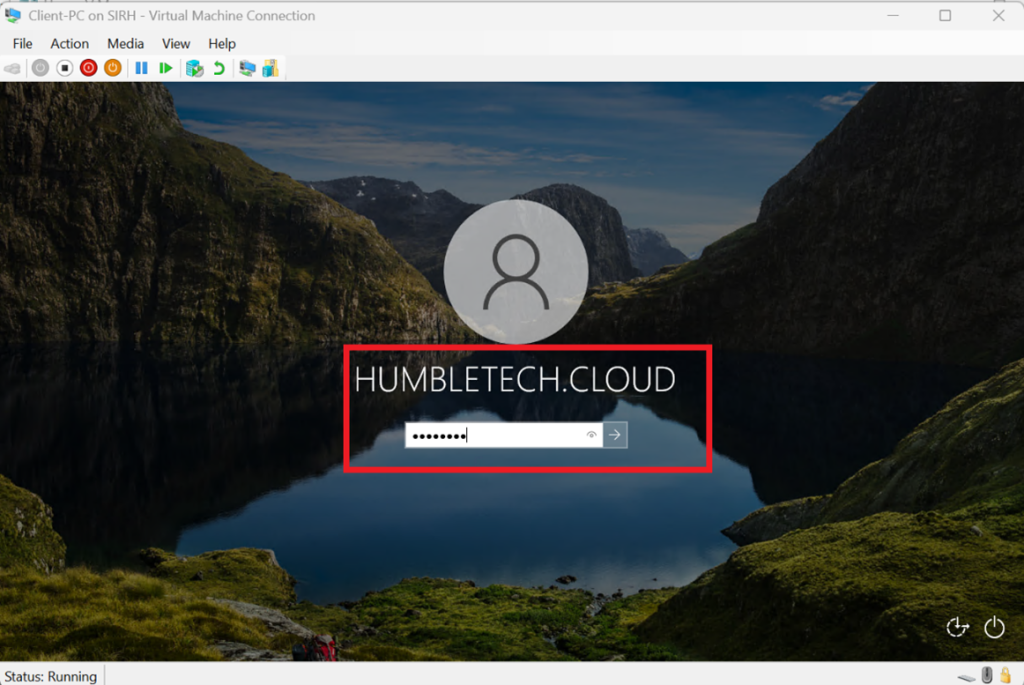
Logged in with the domain user account


Confirmed in Active Directory Users and Computers (ADUC) that the machine appeared under Computers

Congratulations! You Have Successfully Join a Windows Client to Active Directory on Windows Server 2019

Why This Lab Matters

Domain-joined client computers are essential for:

  • Centralized user authentication

  • Applying and testing Group Policy Objects (GPOs)

  • Enforcing enterprise security controls

  • Simulating hybrid and cloud-integrated identity environments

Microsoft documentation treats domain-joined clients as a core component of Active Directory infrastructure.

Lab Outcome

By the end of this lab, you will have:

  • A Windows client VM successfully joined to the domain

  • Verified communication between the client and Domain Controller

  • A complete environment ready for Group Policy and security testing

This setup forms the foundation for advanced labs such as GPO deployment, login scripts, software distribution, and hybrid identity scenarios.


Discover more from Humble Cloud Tech

Subscribe to get the latest posts sent to your email.

Leave a Comment

Your email address will not be published. Required fields are marked *

We use cookies to personalise content and ads, to provide social media features and to analyse our traffic. We also share information about your use of our site with our social media, advertising and analytics partners. View more
Cookies settings
Accept
Decline
Privacy & Cookie policy
Privacy & Cookies policy
Cookie name Active

Who we are

Suggested text: Our website address is: https://humbletech.cloud.

Comments

Suggested text: When visitors leave comments on the site we collect the data shown in the comments form, and also the visitor’s IP address and browser user agent string to help spam detection. An anonymised string created from your email address (also called a hash) may be provided to the Gravatar service to see if you are using it. The Gravatar service Privacy Policy is available here: https://automattic.com/privacy/. After approval of your comment, your profile picture is visible to the public in the context of your comment.

Media

Suggested text: If you upload images to the website, you should avoid uploading images with embedded location data (EXIF GPS) included. Visitors to the website can download and extract any location data from images on the website.

Cookies

Suggested text: If you leave a comment on our site you may opt in to saving your name, email address and website in cookies. These are for your convenience so that you do not have to fill in your details again when you leave another comment. These cookies will last for one year. If you visit our login page, we will set a temporary cookie to determine if your browser accepts cookies. This cookie contains no personal data and is discarded when you close your browser. When you log in, we will also set up several cookies to save your login information and your screen display choices. Login cookies last for two days, and screen options cookies last for a year. If you select "Remember Me", your login will persist for two weeks. If you log out of your account, the login cookies will be removed. If you edit or publish an article, an additional cookie will be saved in your browser. This cookie includes no personal data and simply indicates the post ID of the article you just edited. It expires after 1 day.

Embedded content from other websites

Suggested text: Articles on this site may include embedded content (e.g. videos, images, articles, etc.). Embedded content from other websites behaves in the exact same way as if the visitor has visited the other website. These websites may collect data about you, use cookies, embed additional third-party tracking, and monitor your interaction with that embedded content, including tracking your interaction with the embedded content if you have an account and are logged in to that website.

Who we share your data with

Suggested text: If you request a password reset, your IP address will be included in the reset email.

How long we retain your data

Suggested text: If you leave a comment, the comment and its metadata are retained indefinitely. This is so we can recognise and approve any follow-up comments automatically instead of holding them in a moderation queue. For users that register on our website (if any), we also store the personal information they provide in their user profile. All users can see, edit, or delete their personal information at any time (except they cannot change their username). Website administrators can also see and edit that information.

What rights you have over your data

Suggested text: If you have an account on this site, or have left comments, you can request to receive an exported file of the personal data we hold about you, including any data you have provided to us. You can also request that we erase any personal data we hold about you. This does not include any data we are obliged to keep for administrative, legal, or security purposes.

Where your data is sent

Suggested text: Visitor comments may be checked through an automated spam detection service.
Save settings
Scroll to Top