A practical Azure App Service lab covering staging slots, slot swaps, autoscaling, and traffic testing.
Modern applications are expected to update without outages and scale automatically when traffic spikes. Achieving this reliably requires more than just deploying code, it demands the right platform features and release strategy.
This hands-on lab tutorial will walk you through deploying and managing a web application using Azure App Service. The focus stays on zero-downtime releases, safe testing with deployment slots, and autoscaling under load, all using Azure’s native PaaS capabilities.
Lab Objectives
By the end of this lab, you will be able to:
-
Create and configure an Azure Web App
-
Use deployment slots for safe pre-production testing
-
Perform slot swaps with zero downtime
-
Configure autoscaling on an App Service Plan
-
Validate scaling behavior using load testing
-
Understand real-world PaaS deployment patterns
Lab Environment Overview
The environment used in this walkthrough includes
-
Azure App Service Web App
-
App Service Plan (Premium V3)
-
.NET runtime on Windows
-
Production and Staging deployment slots
-
Autoscaling enabled
-
Azure Load Testing
Architecture Overview
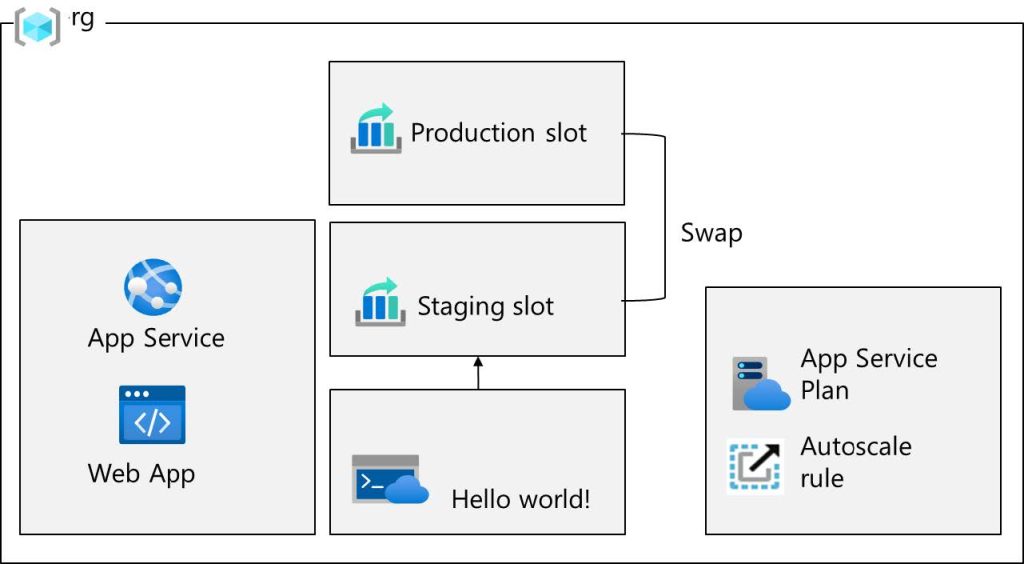
Create and configure an Azure web app
What is Azure Web App (Azure App Service)?
Azure Web App is a fully managed Platform as a Service (PaaS) offering from Microsoft that allows you to build, deploy, and scale web applications without managing underlying infrastructure such as servers, OS patching, or runtime updates.
It supports:
-
.NET, Java, Node.js, Python, PHP
-
Built-in scaling, monitoring, and security
-
Integration with Azure Monitor and Application Insights
How Zero-Downtime Deployment Works
-
New version is deployed to the staging slot
-
Application is warmed up and validated
-
Azure performs a slot swap
-
Production traffic is redirected instantly
Existing user sessions remain active during the swap.
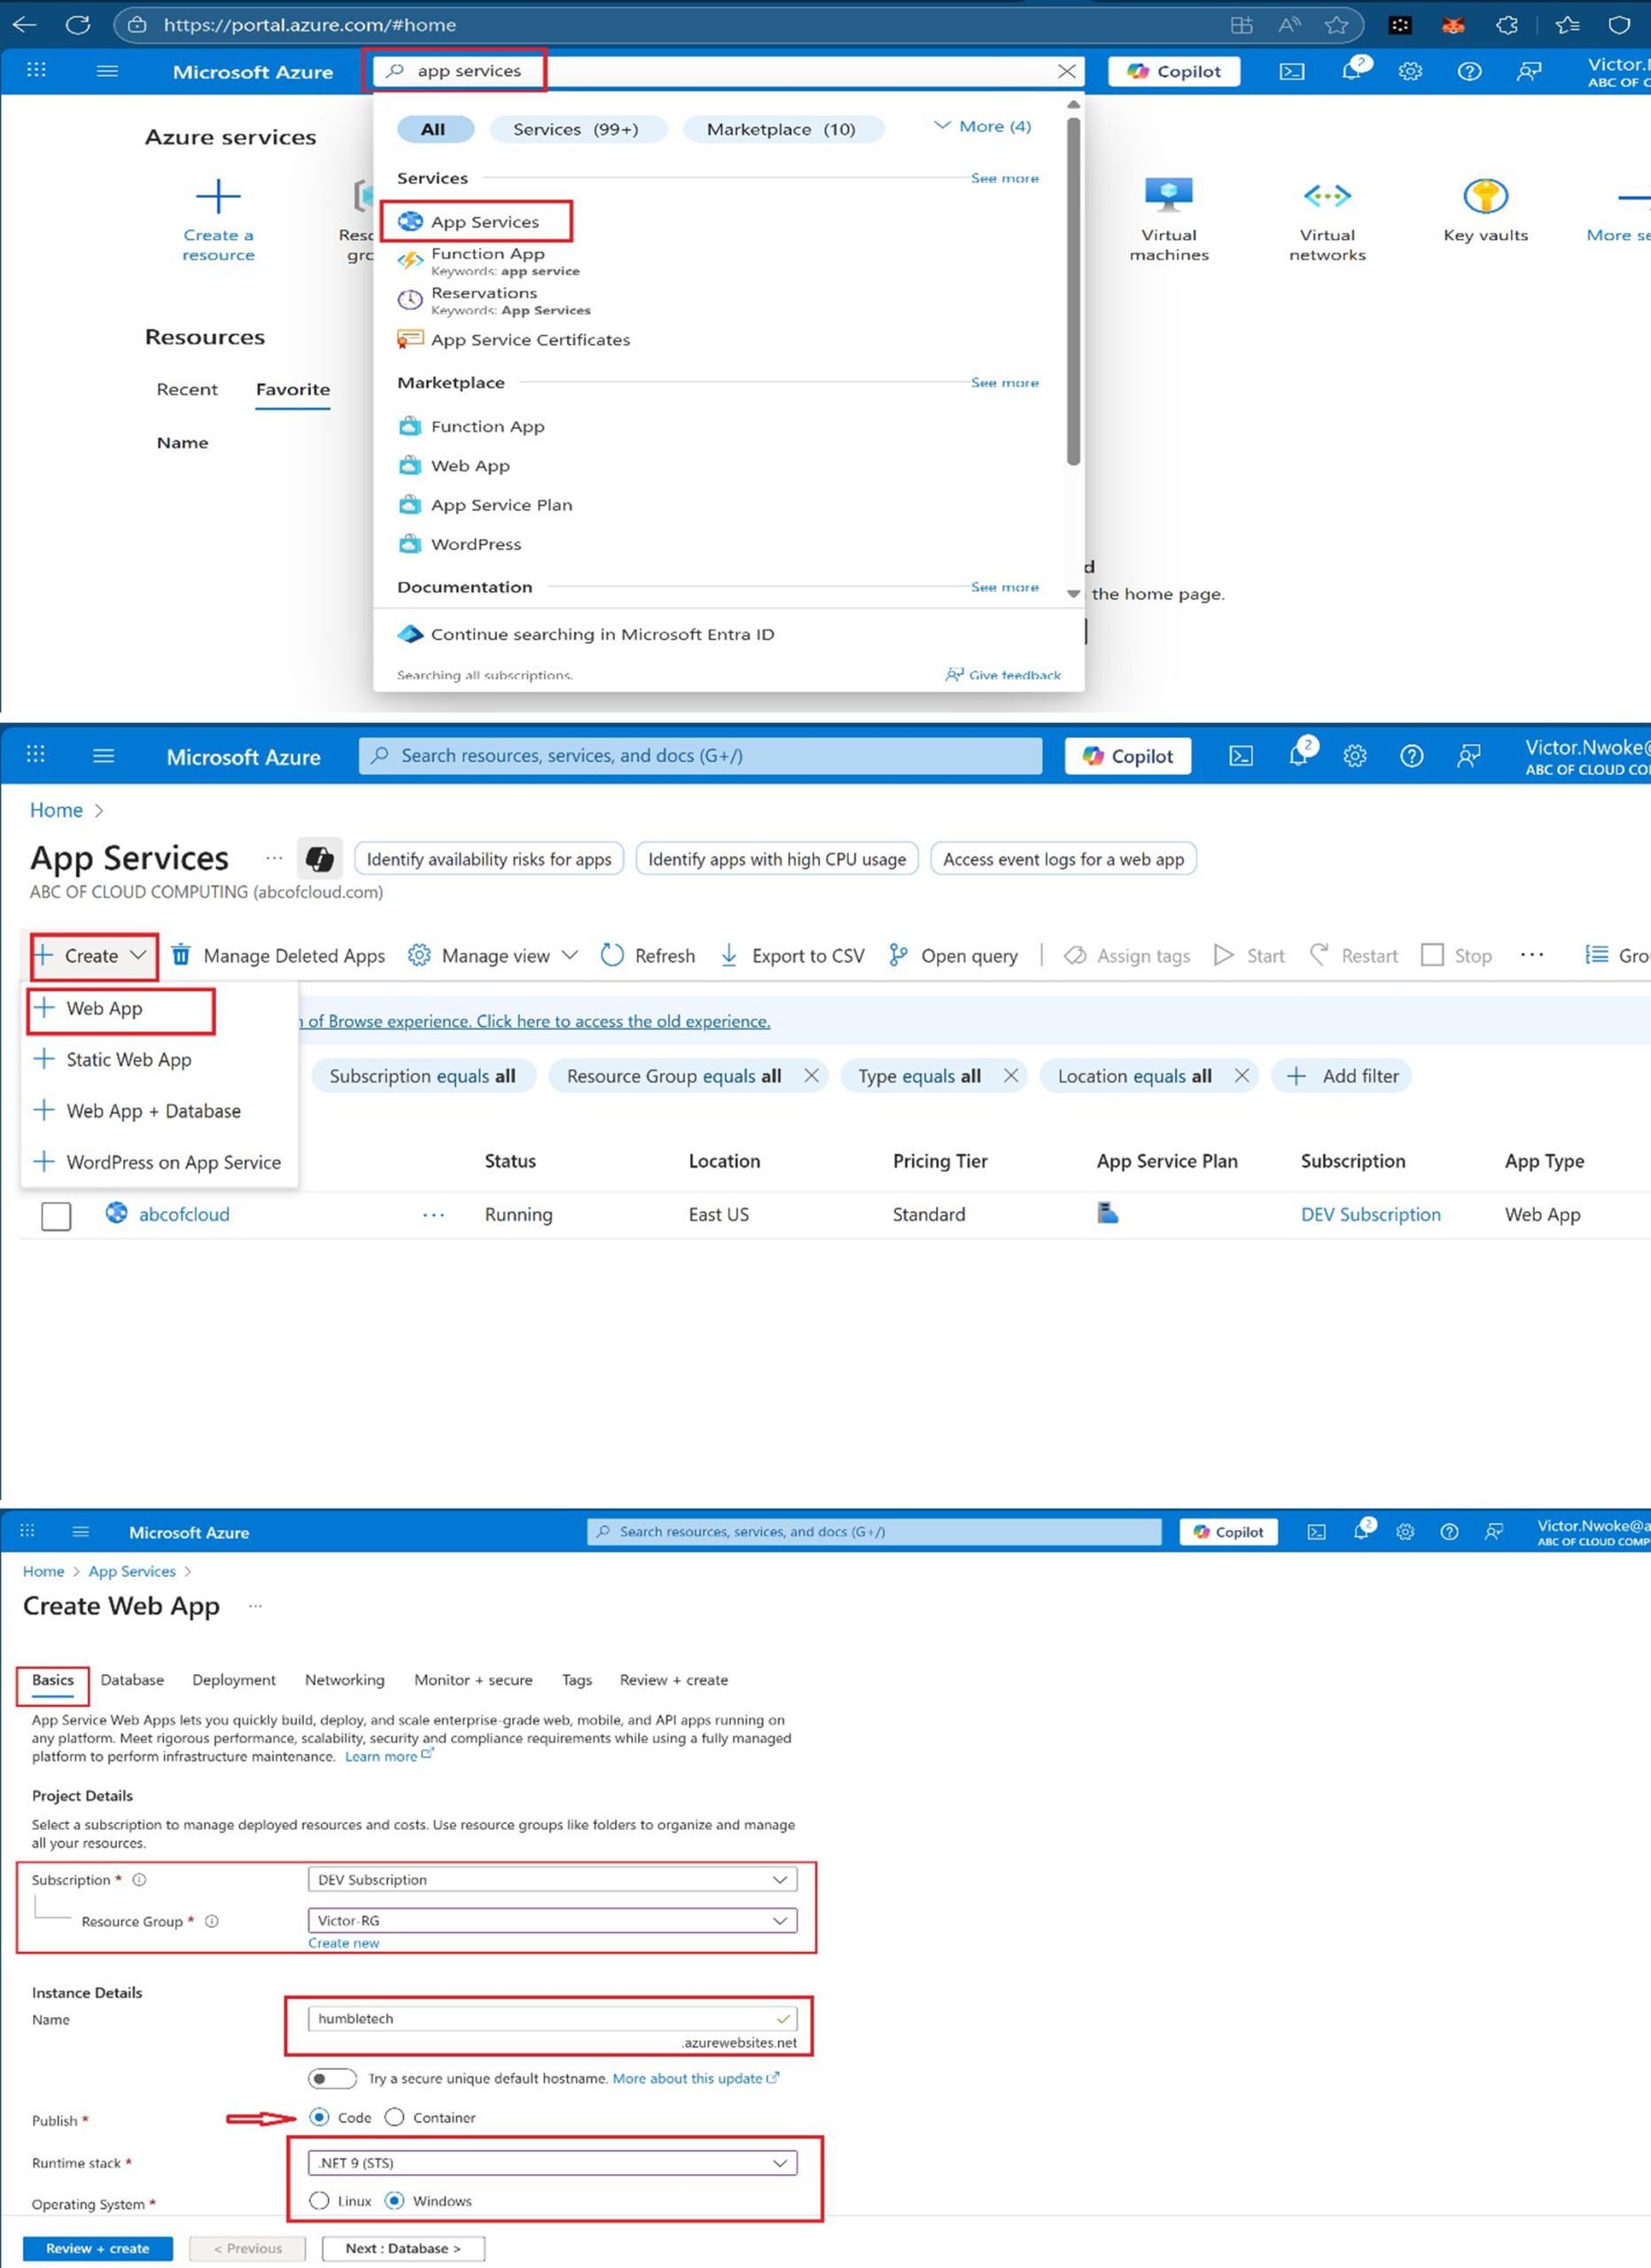
Steps to Create Web App on Azure Portal
- Sign in to the Azure portal
- Search for and select App.
- Select + Create, from the drop-down menu, Web App.
- On the Basics tab of the Create Web App blade, specify the following settings:
- Select runtime stack (.NET on Windows)
- Choose a Premium V3 App Service Plan
- Click Review + Create, and then Create.
This establishes the production hosting environment.

Create and configure a deployment slot
Deployment slots enable you to perform testing before making your app available to the public (or your end users). After you have performed testing, you can swap the slot from development or staging to production. Organizations use slots to perform pre-production testing. Additionally, many organizations run multiple slots for every application (for example, development, QA, test, and production).
Deployment slots allow:
-
Isolated testing environments
-
Validation before public release
-
Safe promotion of tested code
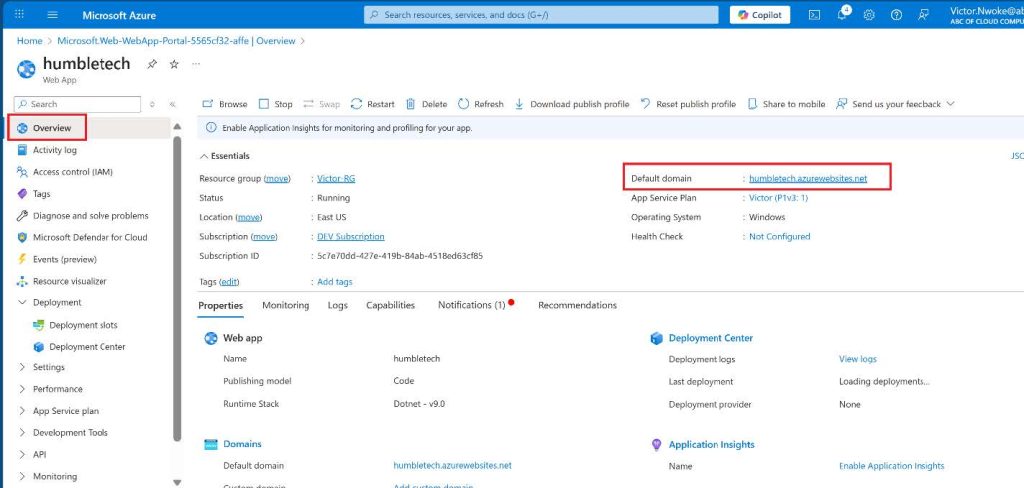
After creation, the staging slot receives its own URL for verification.
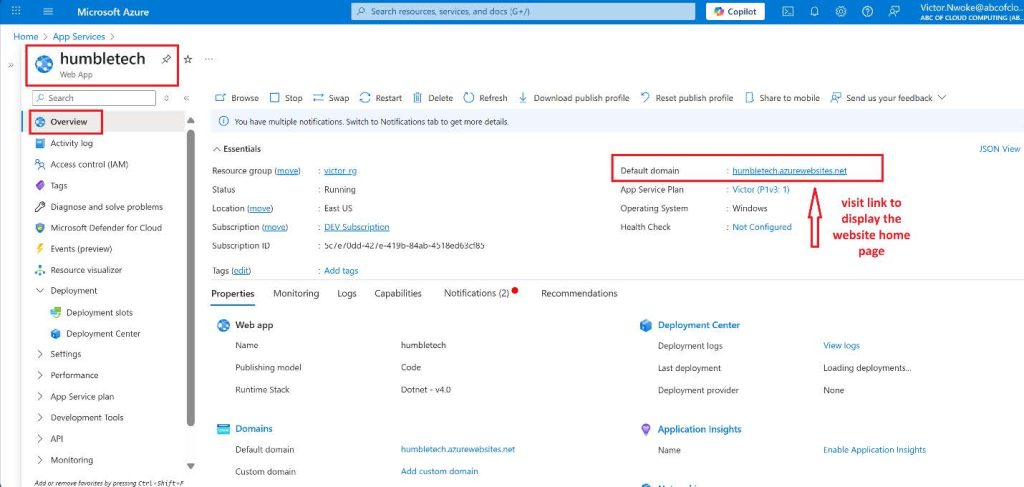
- On the blade of the newly deployed Web App, click the Default domain link to display the Default web page in a new browser tab.

- Close the new browser tab, and back in the Azure portal, in the Deployment section of the Web App blade, click Deployment slots.
- Click Add slot, and add a new slot with the following settings:
- Select Add to create the slot


- Refresh the page to view the Production and Staging slot.
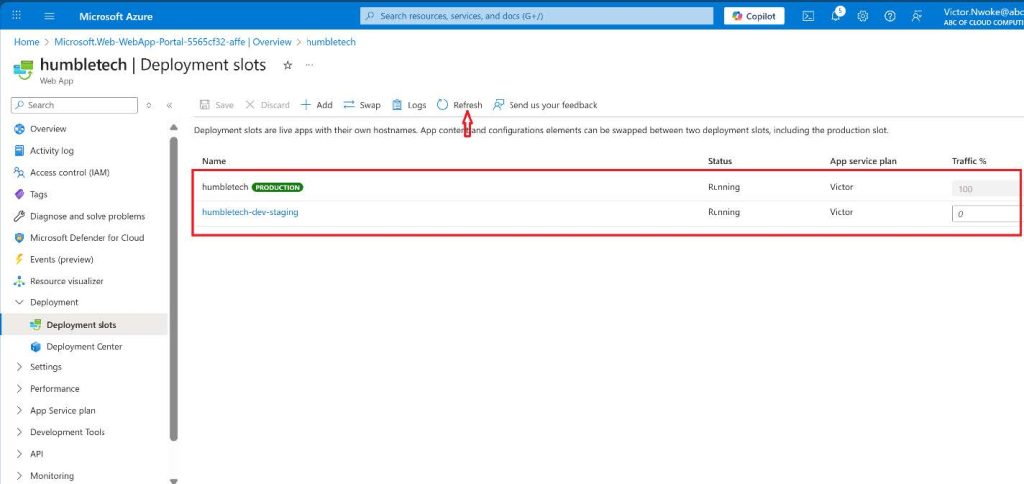
- Select the entry representing the newly created staging slot.
Note: This will open the blade displaying the properties of the staging slot.
- Review the staging slot blade and note that its URL differs from the one assigned to the production slot.

Configure Web App deployment settings
Deployment settings allow for continuous deployment. This ensures that the app service has the latest version of the application.
Key points:
-
Changes apply only to the staging slot
-
Production remains untouched
-
Validation happens through the staging URL
This step confirms the slot is functioning independently.
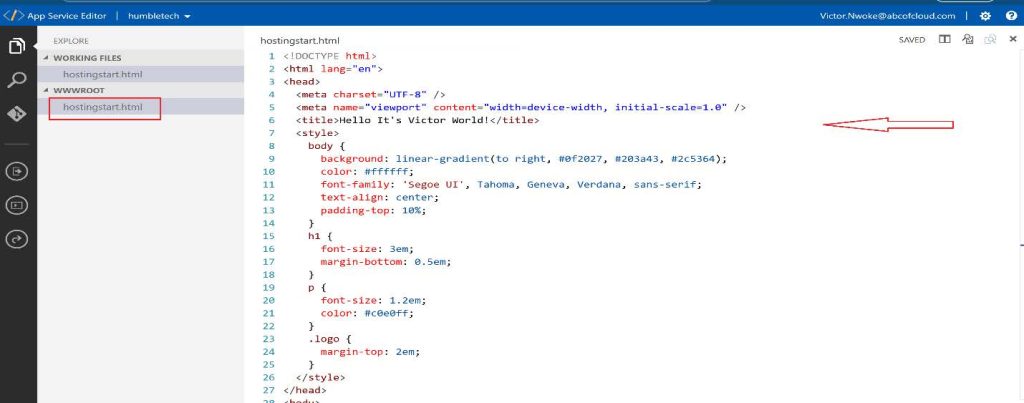
- In the staging slot, select Deployment Tools → App Service Editor (Preview) and then select Open Editor.
Note: Make sure you are on the staging slot blade (instead of the production slot)

- In the App Service Editor, select hostingstart.html. Edit the default web page to your own. For this Demo, you can customize the web page. It is saved automatically.
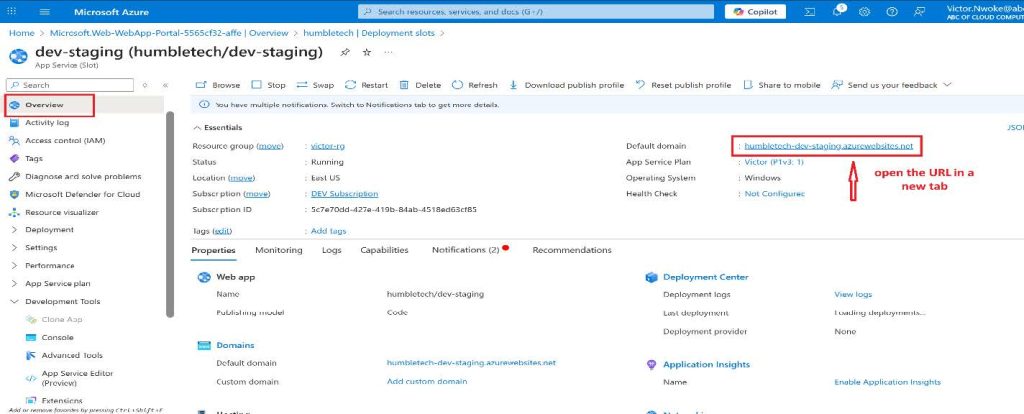
- From the staging slot, select Overview.
- Select the Default domain link, and open the URL in a new tab
- Verify that the staging slot displays Hello World.
Note: The deployment may take a minute. Be sure to Refresh the application page.

Swap deployment slots
Swapping a slot allows you to use the code that you have tested in your staging slot and move it to production. The Azure portal will also prompt you if you need to move other application settings that you have customized for the slot. Swapping slots is a common task for application teams and application support teams, particularly those responsible for deploying routine app updates and bug fixes.
During the swap:
-
Azure warms up the target slot
-
Connections are preserved
-
Downtime is avoided
After completion, the production URL reflects the updated content.
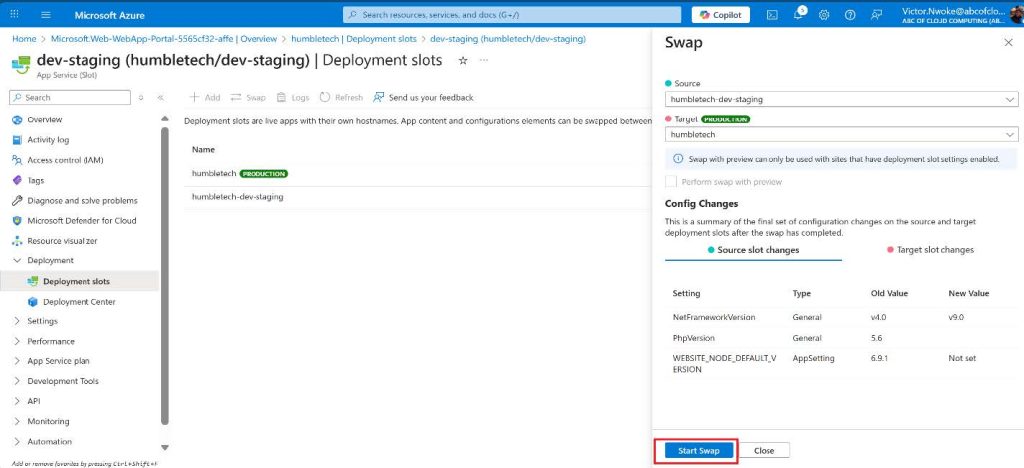
- Navigate back to the Deployment slots blade, and then select Swap

- Review the default settings and click Start Swap. Wait for the notification that the swap has finished
- Return to the portal home page. You should have both the production web app and the staging slot.
- Search for App Services and select your App Service web app. This returns you to the Production Deployment slot.
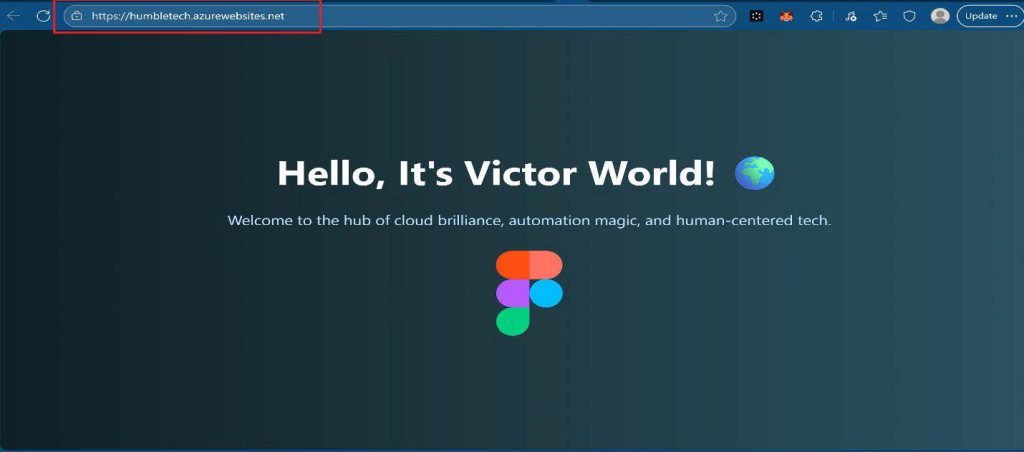
- Select the App Service web app, and on the Overview blade of the Web App, select the Default domain link to display the website home page.
- Verify the production web page now displays “Hello, It’s Victor World!” which is my customized page.
Configure and test autoscaling of the Azure Web App
Autoscaling enables you to maintain optimal performance for your web app when traffic to the web app increases. To determine when the app should scale, you can monitor metrics like CPU usage, memory, or bandwidth.
Configuration Highlights
-
Enable automatic scale-out
-
Define maximum instance count
-
Use metrics such as CPU or requests
This allows the app to respond dynamically to demand.
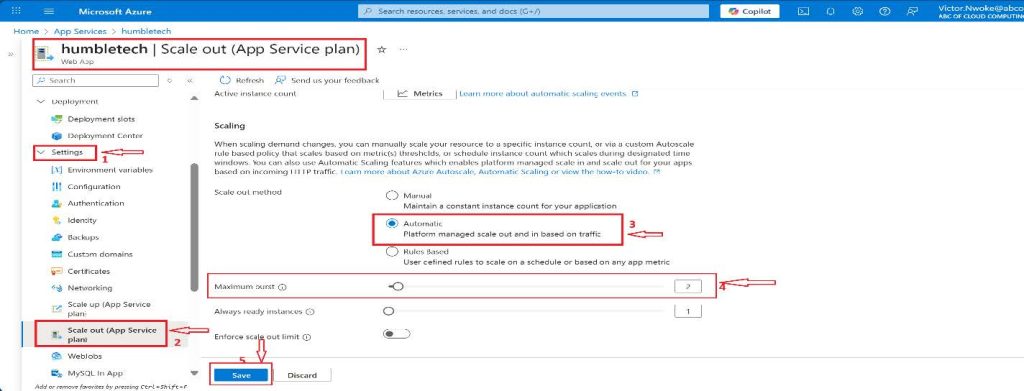
- In the Settings section, select Scale out (App Service plan).
Note: Ensure you are working on the production slot, not the staging
- From the Scaling section, select Automatic.
- Notice the Rules-Based option.
- Rules-based scaling can be configured for different app metrics.
- In the Maximum burst field, select 2. Then Select Save.
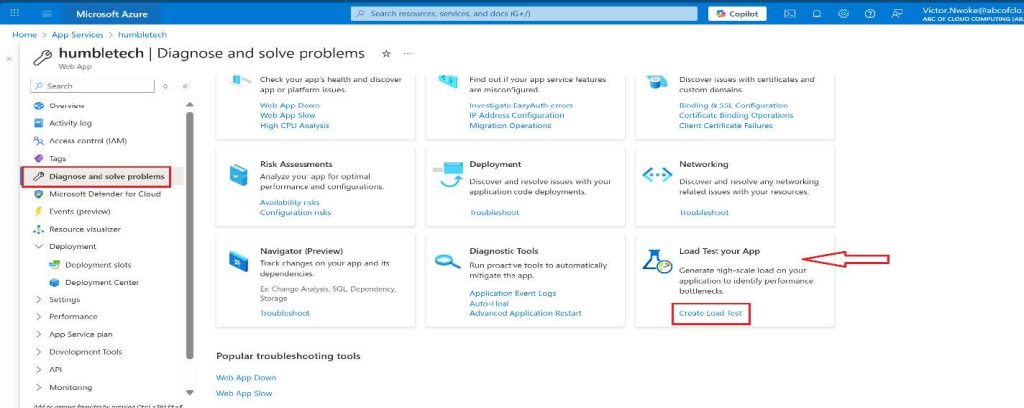
- Select Diagnose and solve problems (left pane).
- In the Load Test Your App box, select Create Load Test.
- Select + Create and give your load test a name. The name must be unique.
- Select Review + create and then Create.


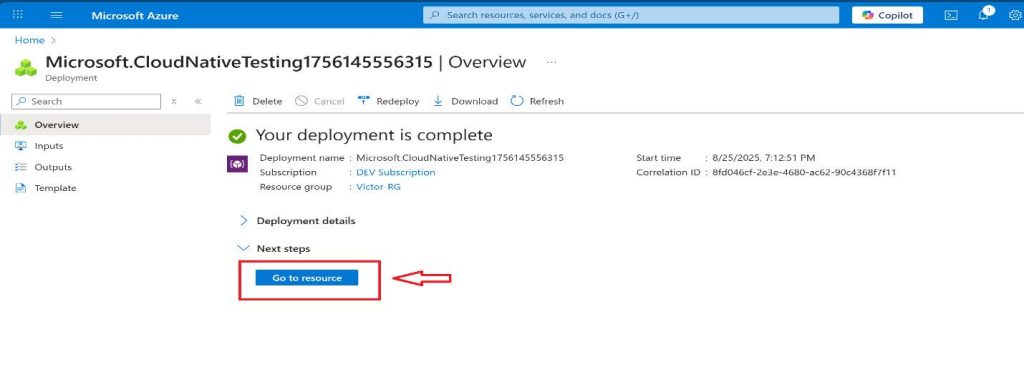
- Wait for the load test to create, and then select Go to resource.
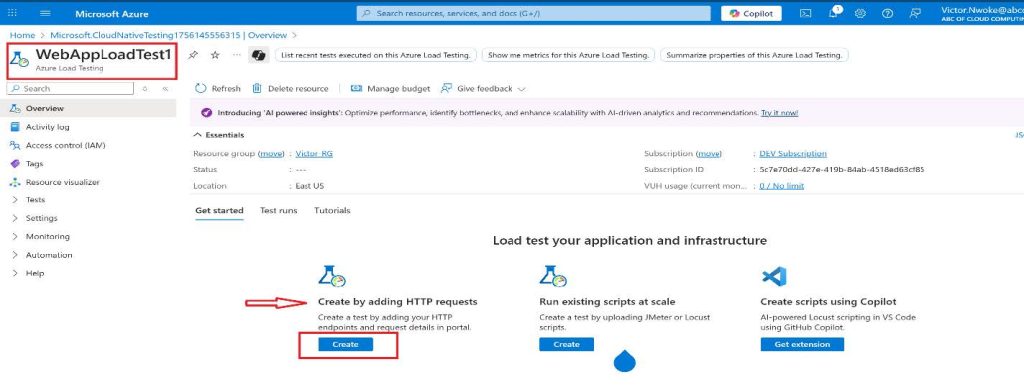
- From the Overview, Create by adding HTTP requests
- Select Create.
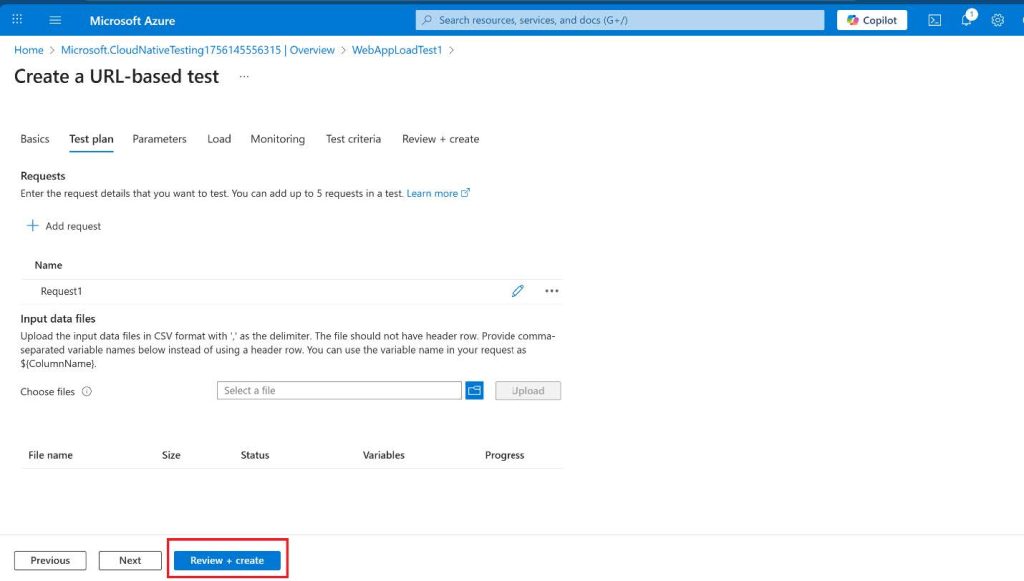
- On the Test plan tab, click Add request.
- In the URL field, paste in your Default domain URL.
- Ensure this is properly formatted and begins with https://humbletech.azurewebsites.net.
- Select Add to save your changes.

- Select Review + create and Create.
Note: It may take a couple of minutes to create the test. Watch the notifications.
- Navigate to the test (it is listed on the home page).
- Refresh and review the live metrics, including Virtual users, Response time, and Requests/sec.
- Select Stop to complete the test run. You don’t need to wait for the test to be completed.

Test Autoscaling with Load Testing
To validate scaling behavior, Azure Load Testing is used.
The test simulates:
-
Concurrent users
-
Increased request rates
-
Real-time traffic patterns
Metrics such as response time and instance count confirm that autoscaling works as expected.
Key Takeaway
Azure App Service simplifies application deployment, scaling, and zero-downtime releases.
By combining deployment slots, autoscaling, and load testing, teams can ship updates confidently while maintaining reliability—whether supporting small applications or enterprise workloads.