Effective governance is essential as cloud environments grow. Without proper controls, organizations often face challenges in visibility, accountability, and cost tracking. In this lab, we explore how to implement governance practices in Azure using Azure Policy, Resource Tags, and Resource Locks.
Policies help enforce operational standards and compliance requirements across resources. Resource tags improve reporting and management, allowing you to track details such as owners, projects, cost centers, and support contacts. Resource locks prevent accidental modifications or deletions.
These practices align with the Microsoft Well-Architected Framework and the Cloud Adoption Framework, forming the foundation for efficient and secure cloud management.
Understanding the Key Concepts
-
Azure Policy: Enforce standards and compliance across resources.
-
Resource Tags: Add metadata (owner, project, cost center) for reporting and accountability.
-
Resource Locks: Prevent accidental modifications or deletions.
Assign tags via the Azure portal
Tags allow you to add metadata to resources for tracking and reporting. In this lab, we assign a cost center tag to a resource group.
For this task, you assign a tag identifying the resource cost center.
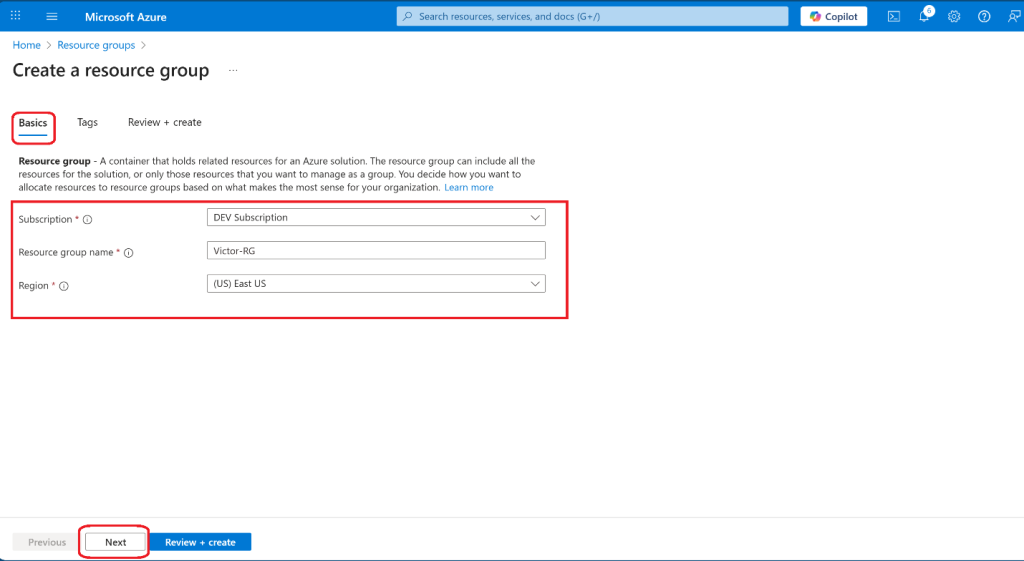
- Sign in to the Azure portal
- Search for and select Resource groups
- From the Resource groups, select + Create.
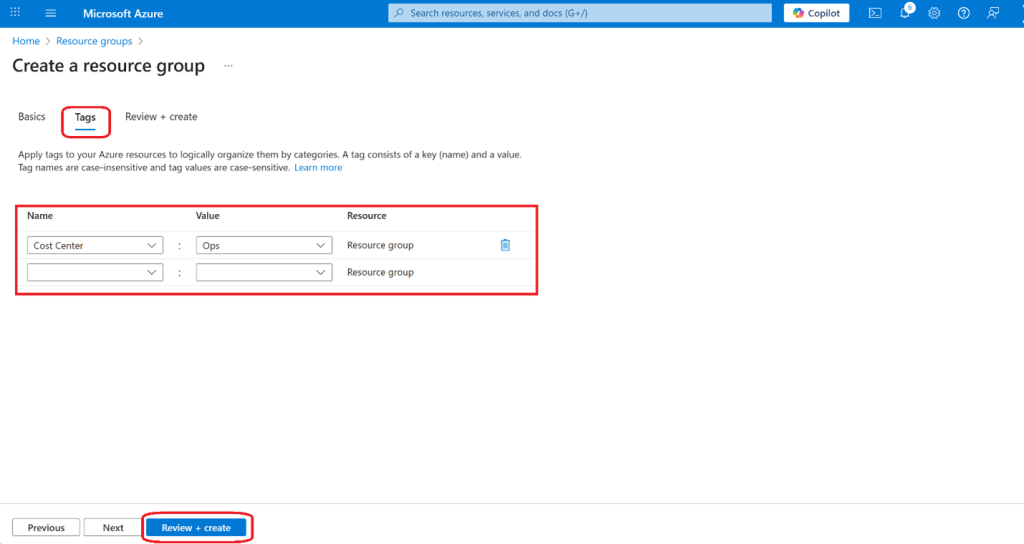
- Select Next and move to the Tags Provide information for a new tag.
- Select Review + Create, and then select
Enforce tagging via an Azure Policy
In this lab, we will assign the built-in “Require a tag and its value on resources” policy to the resource group and evaluate the outcome.
- In the Azure portal, search for and select Policy

- In the Authoring blade, select Definitions.
Note: Take a moment to browse through the list of built-in policy definitions that are available for you to use. Notice you can also search for a definition
- Search for the “Require a tag and its value on resources” built-in policy.
- Select Assign policy

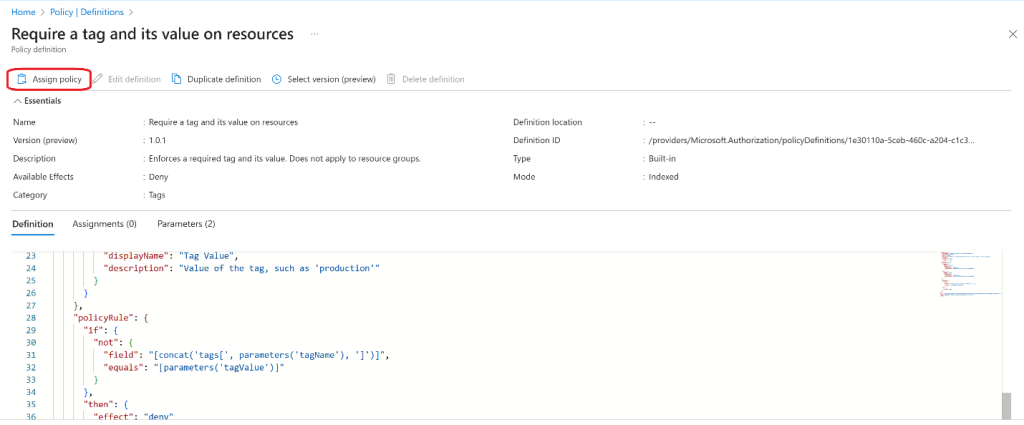
- Specify the Scope by clicking the ellipsis button and selecting the subscription and resource group. Click Select when you are done.
- Configure the Basics properties of the assignment by specifying the settings and name (leave others with their defaults)
Note: The Assignment name is automatically populated with the policy name you selected, but you can change it. The Description is optional. Notice you can disable the policy at any time.
- Click Next and set Parameters: Tag Name and Tag Value


- Click Next and review the Remediation Leave the Create a Managed Identity checkbox unchecked.
- Click Review + Create and then click Create.
Note: It might take between 5 and 10 minutes for the policy to take effect.

Create a Storage Account to Test the Policy
Note: Now you will verify that the new policy assignment is in effect by attempting to create an Azure Storage account in the resource group. You will create the storage account without adding the required tag.
- In the portal, search for and select Storage Accounts, and select + Create.
- On the Basics tab of the Create storage account blade, complete the configuration. → Select Review and then click Create.

You should receive a “Validation failed” message. View the message to identify the reason for the failure. Verify the error message states that the resource deployment was disallowed by the policy.

Note: By clicking the Raw Error tab, you can find more details about the error, including the name of the role definition Require a tag and its value on resources. The deployment failed because the storage account you attempted to create did not have a tag named Cost Center with its value set to Default.
Apply tagging via an Azure policy
In this task, we will use the new policy definition to remediate any non-compliant resources. We will make any child resources of a resource group inherit the Cost Center tag that was defined on the resource group.
- In the Azure portal, search for and select Policy
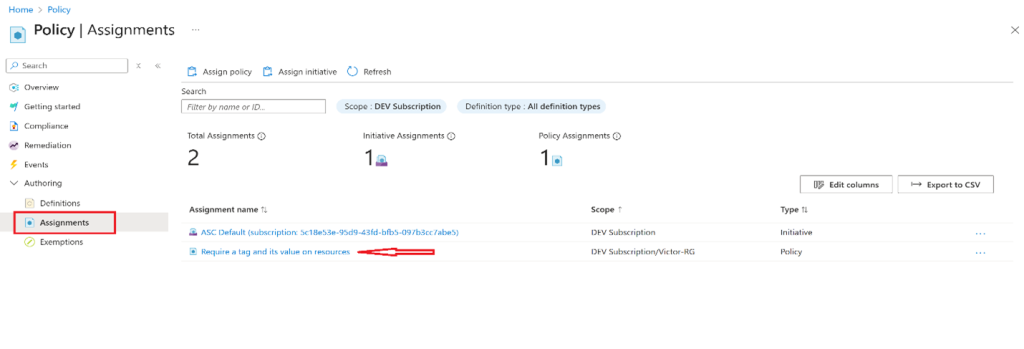
- In the Authoring section, click Assignments.
- In the list of assignments, click the ellipsis icon in the row representing the “Require a tag and its value on resources” policy assignment and use the “Delete assignment” menu item to delete the assignment.

- Click Assign policy and specify the Scope by clicking the ellipsis button and selecting the following values: Your Subscription and Resource Group.
- To specify the Policy definition, click the ellipsis button and then search for and select “Inherit a tag from the resource group if missing.”
- Select Add and then configure the remaining Basics properties of the assignment.

- Click Next and set Parameters to the following values: Tag Name


- Click Nextand, on the Remediation tab, configure the below settings (leave others with their defaults):
Note: This policy definition includes the Modify effect. So, a managed identity is required.
- Click Review + Createand then click Create.
Note: To verify that the new policy assignment is in effect, you will create another Azure storage account in the same resource group without explicitly adding the required tag.
Note: It might take between 5 and 10 minutes for the policy to take effect.

Create a Storage Account to Test the Policy
Note: Now you will verify that the new policy assignment is in effect by attempting to create an Azure Storage account in the resource group. You will create the storage account without adding the required tag.
- Search for and select Storage Account and click + Create.
- On the Basics tab of the Create storage account blade, verify that you are using the Resource Group that the Policy was applied to and specify the following settings (leave others with their defaults) and click Review:

- Verify that this time the validation passed and click Create.
- Once the new storage account is provisioned, click Go to resource.
- On the Tagsblade, note that the tag Cost Center with the value Ops has been automatically assigned to the resource
Did you know? If you search for and select Tags in the portal, you can view the resources with a specific tag.

Configure and test resource locks
In this task, you configure and test a resource lock. Locks prevent either deletions or modifications of a resource.
- Search for and select your resource group.
- In the Settings blade, select Locks.
- Select Add and complete the resource lock information. When finished, select Ok.

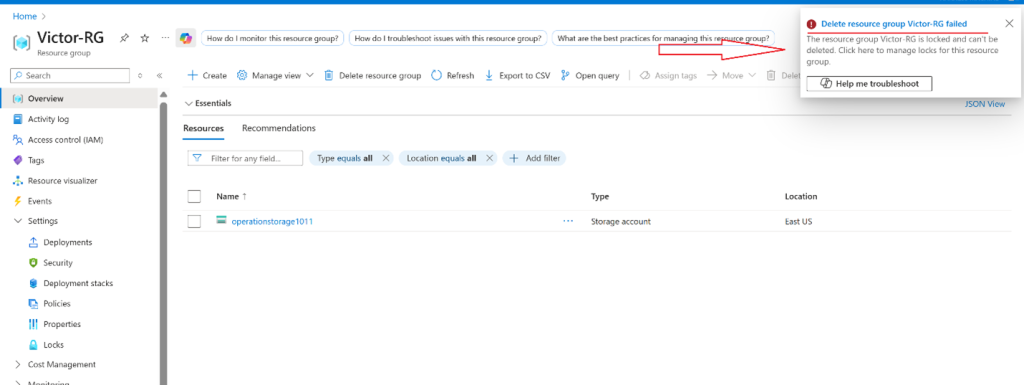
- Navigate to the resource group Overview blade and select Delete resource group.
- In the Enter resource group name to confirm deletion textbox, provide the resource group name. Notice you can copy and paste the resource group name.
- Notice the warning: Deleting this resource group and its dependent resources is a permanent action and cannot be undone. Select Delete.

- You should receive a notification denying the deletion.
Key Takeaways
-
Governance in Azure improves visibility, accountability, and cost control.
-
Tags, policies, and locks are core pillars of the Microsoft Well-Architected Framework.
-
Policies enforce compliance, tags provide metadata for reporting, and locks protect resources from accidental changes.
-
Implementing these practices ensures clarity and confidence in cloud operations.
Next Steps / Advanced Labs
-
Explore advanced Azure policies: enforce location restrictions, SKU limits, or naming conventions.
-
Combine tagging and policies with Azure Cost Management for budget tracking.
-
Implement role-based access control (RBAC) alongside resource locks for additional security.