
A Hands-On Azure Networking Lab: Virtual Networks, VPN Gateway, and Certificate Authentication.
Point-to-Site VPN helps us connect through a secure network from a client computer to an Azure virtual network. This simply means you can connect to a compute resource using their private IP on the Azure Virtual Network.
Secure remote access is a common requirement in cloud projects. In this lab, a Point-to-Site (P2S) VPN is configured so a client computer can connect to an Azure Virtual Network (VNet) and reach resources using private IP addresses.
What is Point-to-Site VPN
A Point-to-Site (P2S) VPN gateway creates a secure connection from an individual client device to an Azure VNet. The connection is initiated from the client machine, making it a practical choice for remote workers or scenarios where only a few clients need access to the VNet, such as from home or a conference. P2S VPN is also a useful solution to use instead of S2S VPN when you have only a few clients that need to connect to a VNet.
What is a VPN Gateway
A VPN gateway is a type of virtual network gateway that sends encrypted traffic between:
-
Azure VNets and on-premises networks over the public internet, or
-
VNets across Microsoft’s network (Azure backbone).
Lab Walkthrough: Configure Azure Point-to-Site VPN (Certificates)
Prerequisites
-
Azure subscription
-
Permission to create networking resources
-
Windows 10+ or Windows Server 2016+ for certificate generation via PowerShell
Creating a Virtual Network
A P2S VPN requires a VNet with two subnets:
-
GatewaySubnet (required for VPN gateway)
-
Workload subnet (where your VM will live)
Recommended addressing
-
VNet Address Space:
172.16.0.0/16 -
GatewaySubnet:
172.16.1.0/27(recommended size for many configs) -
Workload subnet (example):
172.16.0.0/24
Portal steps
Firstly, we need to create a Virtual Network
1. Sign in to the Azure Portal.
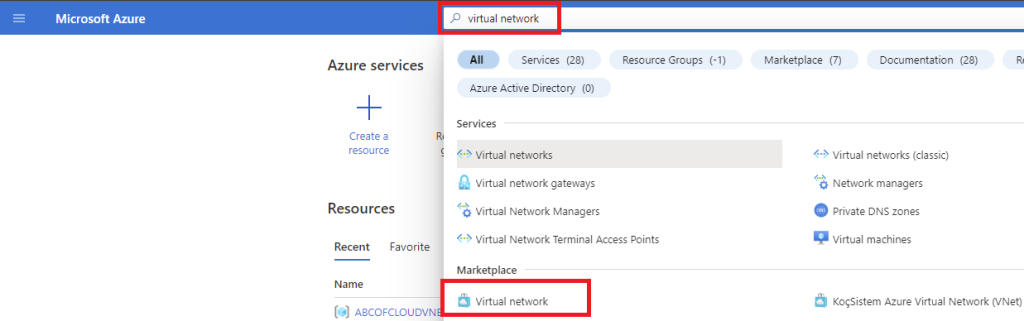
2. Search for virtual network in Azure portal.
3. In the search results, select virtual network right under Marketplace.
4. On the Virtual network page, click on Create.
5. Under the Basics tab, choose the Subscription you want to use for this project.
6. Resource group can be selected from existing resource group, or a new resource group can be created by clicking on Create new.
7. Enter a preferred name for the virtual network.
8. Choose a preferred location for the Virtual Network, by clicking on the drop-down and selecting the region you prefer, and then click on next at the bottom. Note: The location determines where the resources that you deploy to this VNet will live.
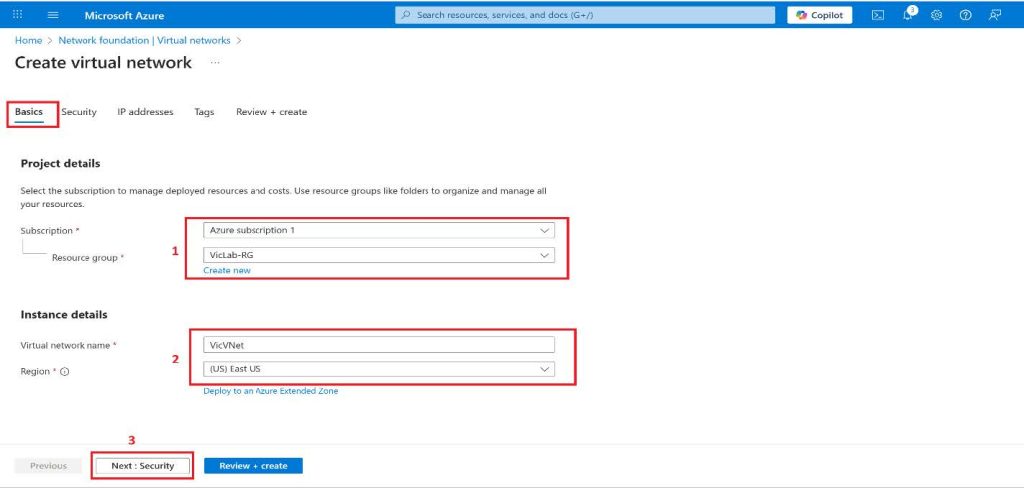
For this tutorial, we will leave the Security tab with the default settings and then click on next again.
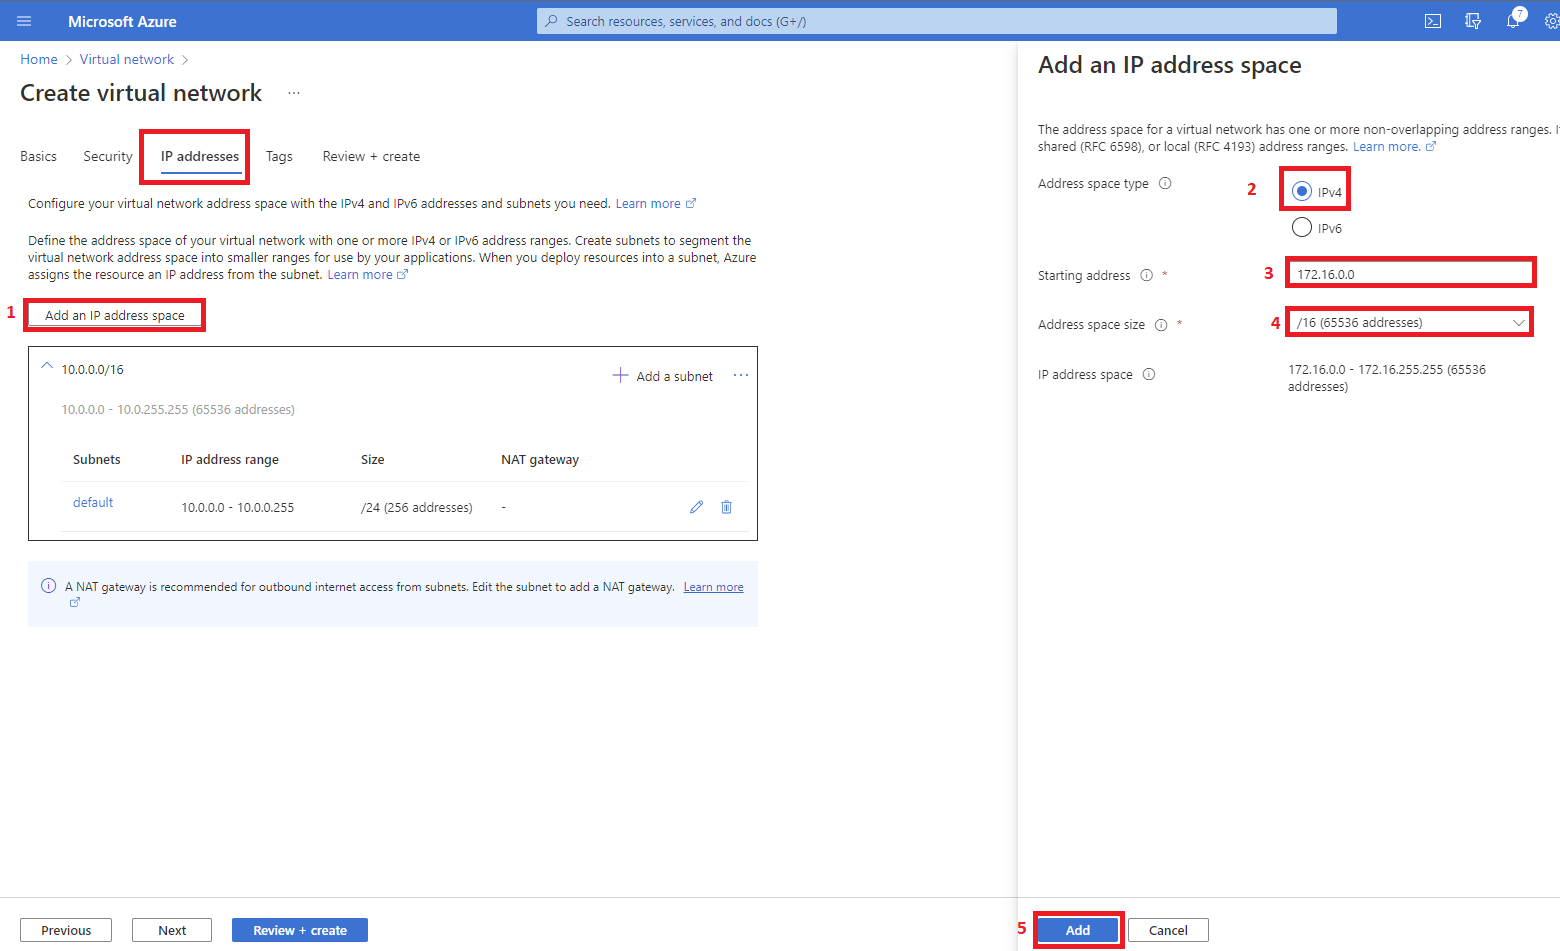
We will be using the 172.16.0.0/16 for our address space and for the subnet we will create two subnets: abcofcloudsubnet with a subnet address space of 172.16.0.0/24.
9. On the IP addresses tab click on the Add an IP address space and select the Address space type radio button for IPv4. Starting address type 172.16.0.0, Address space size use the drop-down to select /16 (65536 addresses) and click the Add button.
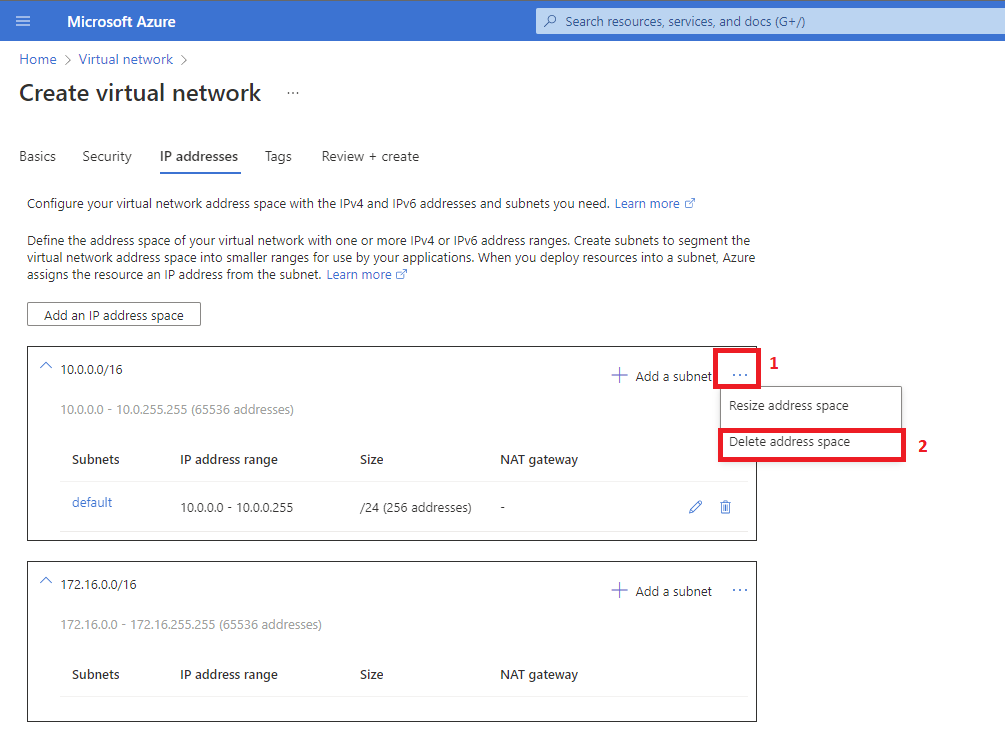
10. After this has been added you can now delete the default address space.
11. This is the time we add our subnet, click on the plus(+) button beside Add a subnet, and on the pop-out button by the right under the Subnet details enter a preferred name, for this tutorial I will be using abcofcloudsubnet, the Starting address as 172.16.0.0 and Subnet size as /24 (256 addresses) then click on the Add button.
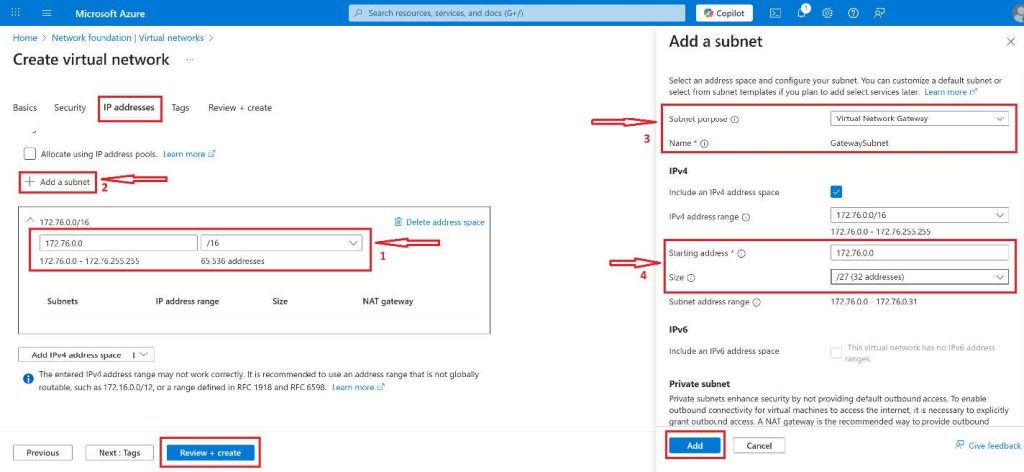
12. Click on the Review + Create button to have an overview of your settings and then click Create.
Let’s Create the VPN Gateway
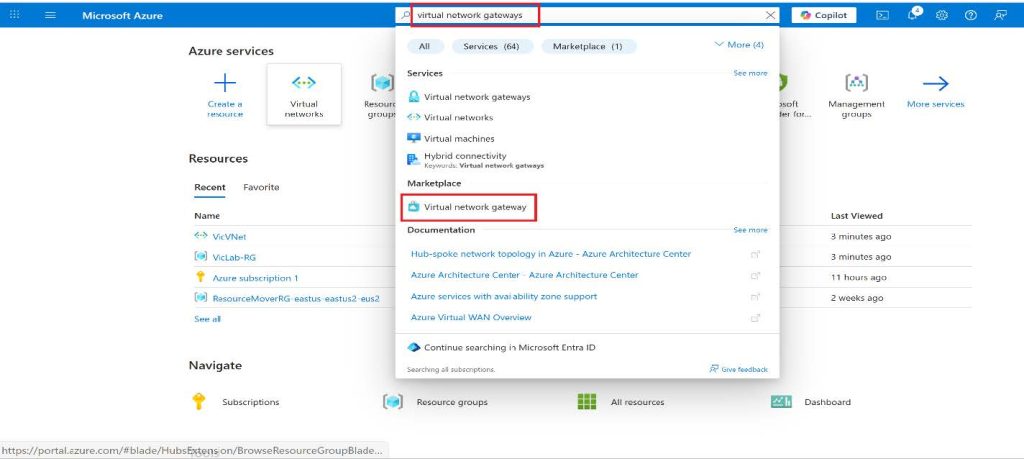
1. Search for Virtual network gateway in Azure portal.
2. In the Search result, under Marketplace select Virtual network gateway.
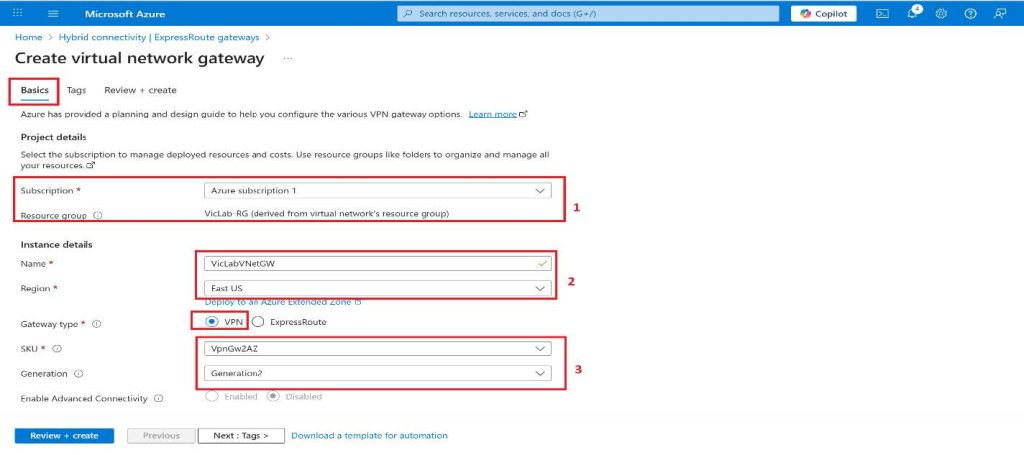
3. Choose the subscription you want from the drop-down.
4. The Resource Group will be auto-filled when we select the virtual network.
5. Enter any preferred name for your gateway.
6. We will be using VPN as the Gateway type in this tutorial.
7. Route-based is the VPN type we will be using for this tutorial, this can be selected based on your requirement or business need.
8. SKU will be VpnGw2AZ for this tutorial, I will be adding some links where you can learn more about the SKU, resizing, and zone redundant.
9. Generation2 will be the choice for this tutorial.
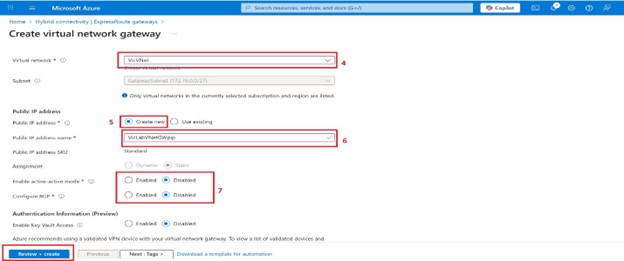
10. Our Virtual network will be the one we created previously.
11. You can either create a subnet in your virtual subnet with the name Gatewaysubnet or you get the Gateway subnet address range automatically.
12. We will change the default Gateway subnet address range to 172.16.1.0/27 or larger which is (/26,/25,/24, etc.) Anything lesser will throw an error if you’re trying to deploy a zone-redundant/zonal gateway and also this allows enough IP addresses for future changes.
13. Public IP address is set to Create new; you can choose to use existing if you already have one created. These settings specify the public IP address object that gets associated with the VPN gateway. The public IP address is assigned to this object when the VPN gateway is created. The only time the primary Public IP address changes is when the gateway is deleted and re-created. It doesn’t change across resizing, resetting, or other internal maintenance/upgrades of your VPN gateway.
14. Enter a preferred name for the Public IP address name.
The Assignment setting is controlled by the Public IP Address Type value.
Enable active-active mode and Configure BGP will be disabled in this tutorial.
15. Click on Review + Create and then Create. Tags can be added based on your requirements.
Once you hit the Create button, it’s time to go get a bottle of drink because I also paused and went to a bottle of drink. Also, make sure you don’t refresh the page because it can take 45 minutes or more to fully create and deploy. You will see the status of the deployment on the overview page for the gateway.
Welcome from the short break, the next thing we will be doing is creating a Self-Sign root and client certificate.
Creating Self-Signed Certificate
1. Open PowerShell with elevated privileges from a computer running Windows 10 or later, or Windows Server 2016.
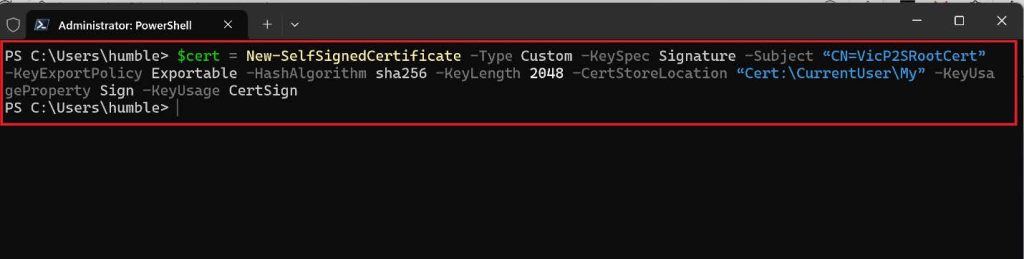
2. Copy and paste the cmdlet below on PowerShell. This cmdlet will create a self-signed root certificate named ‘abcofcloudP2SRootCert’ that is automatically installed in ‘Certificates-Current User\Personal\Certificates’. If you want to use your preferred name modify the CN value.
$cert = New-SelfSignedCertificate -Type Custom -KeySpec Signature `
-Subject “CN=VicP2SRootCert” -KeyExportPolicy Exportable `
-HashAlgorithm sha256 -KeyLength 2048 `
-CertStoreLocation “Cert:\CurrentUser\My” -KeyUsageProperty Sign -KeyUsage CertSign.
Note: Don’t close the PowerShell console; copy the second command to generate a client
certificate.
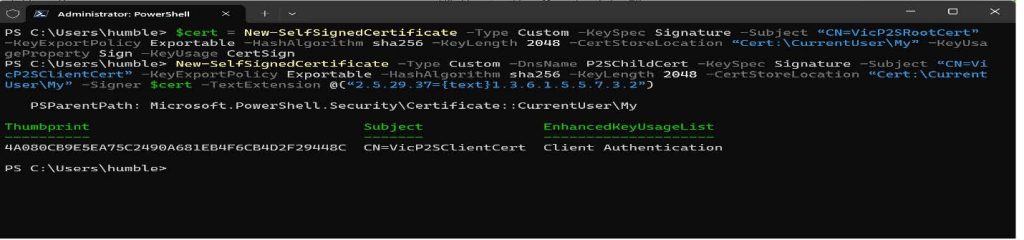
2. If you haven’t closed your PowerShell console after creating the self-signed root certificate. This cmdlet continues from the previous section and uses the declared ‘$cert’ variable. The result is a client certificate named ‘abcofcloudP2SClientCert’. The client certificate that you generate is automatically installed in ‘Certificates – Current User\Personal\Certificates’ on your computer.
New-SelfSignedCertificate -Type Custom -DnsName P2SChildCert -KeySpec Signature `
- Subject “CN=VicP2SClientCert” -KeyExportPolicy Exportable `
-HashAlgorithm sha256 - KeyLength 2048 `
-CertStoreLocation “Cert:\CurrentUser\My” `
-Signer $cert -TextExtension @(“2.5.29.37={text}1.3.6.1.5.5.7.3.2”)
If you mistakenly closed the PowerShell console after running the first? There is a way to handle that. Please skip 2a. 2b. and 2c. if you didn’t close your console before running the second cmdlet.
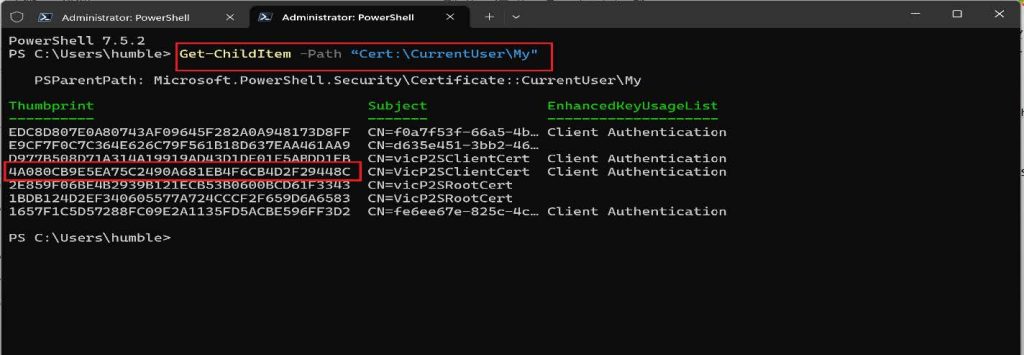
2a. Run this cmdlet to get a list of certificates that are installed on your computer.
Get-ChildItem -Path "Cert:\CurrentUser\My"
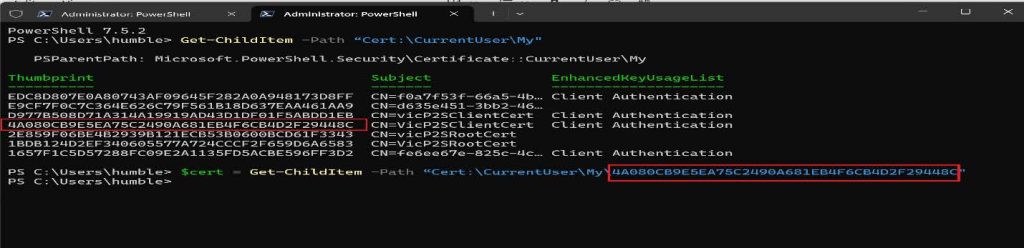
2b. Using the thumbprint of the root certificate that was returned after running the previous cmdlet, run this next cmdlet.
$cert = Get-ChildItem -Path “Cert:\CurrentUser\My\4A080CB9E5EA75C2490A681EB4F6CB4D2F29448C”
Note: 4A080CB9E5EA75C2490A681EB4F6CB4D2F29448C is the thumbprint from my own
root certificate.
2c. You can now run this cmdlet to generate a client certificate. Modify the CN to give it your preferred name.
New-SelfSignedCertificate -Type Custom -DnsName P2SChildCert -KeySpec Signature `
- Subject “CN=VicP2SClientCert” -KeyExportPolicy Exportable `
-HashAlgorithm sha256 - KeyLength 2048 `
-CertStoreLocation “Cert:\CurrentUser\My” `
-Signer $cert -TextExtension @(“2.5.29.37={text}1.3.6.1.5.5.7.3.2”)
Now that we have been able to create our self-signed certificate it is time for us to view and export it.
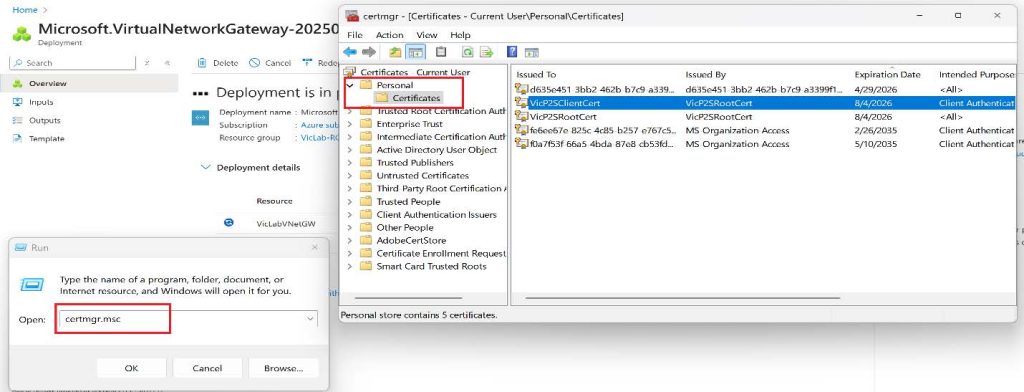
View and Export Root Certificate
1. Press Win + R key and type certmgr.msc or Manage User Certificates, common error that you should avoid is accidentally opening the Certificates of your Local Computer, rather than Certificates of the Current User.
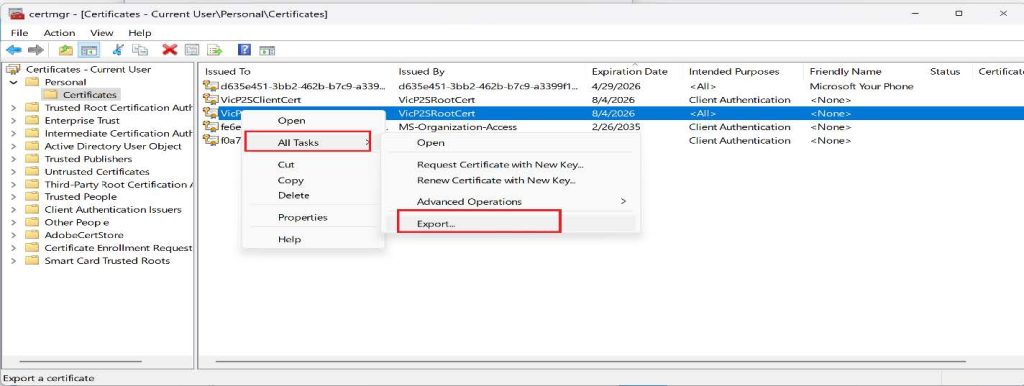
2. Right-click on the root certificate, click on All Task then Click on Export.
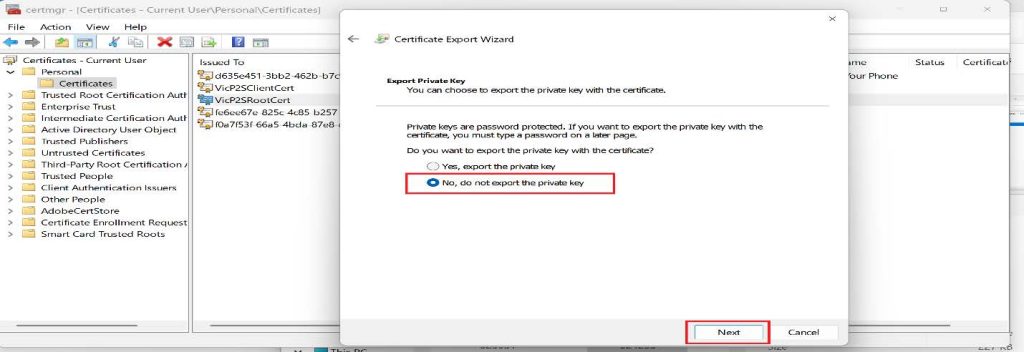
3. Click on Next on the Certificate Export Wizard, and Select No, do not export the private key, then click on Next.
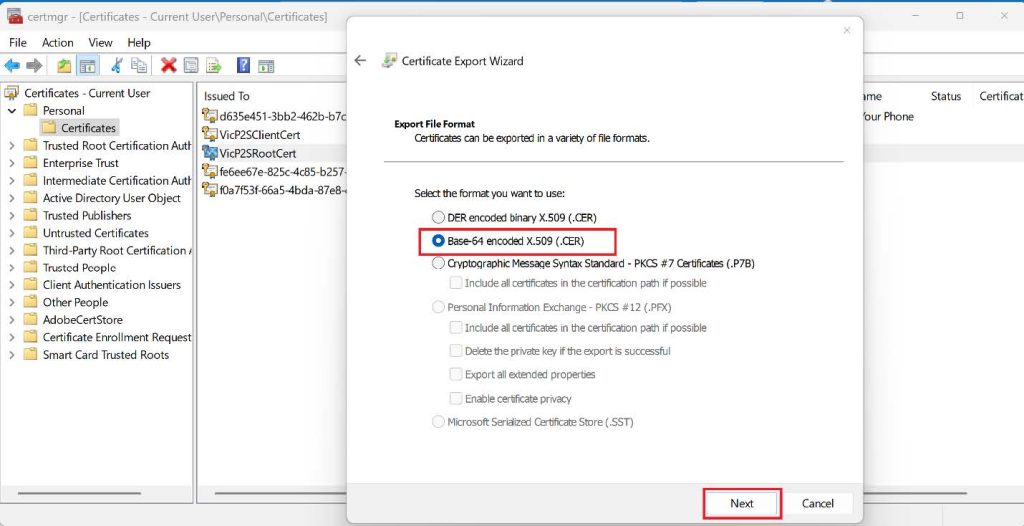
4. On the Export File Format page, select the Base-64 encoded X.509 (.CER), and then click Next.
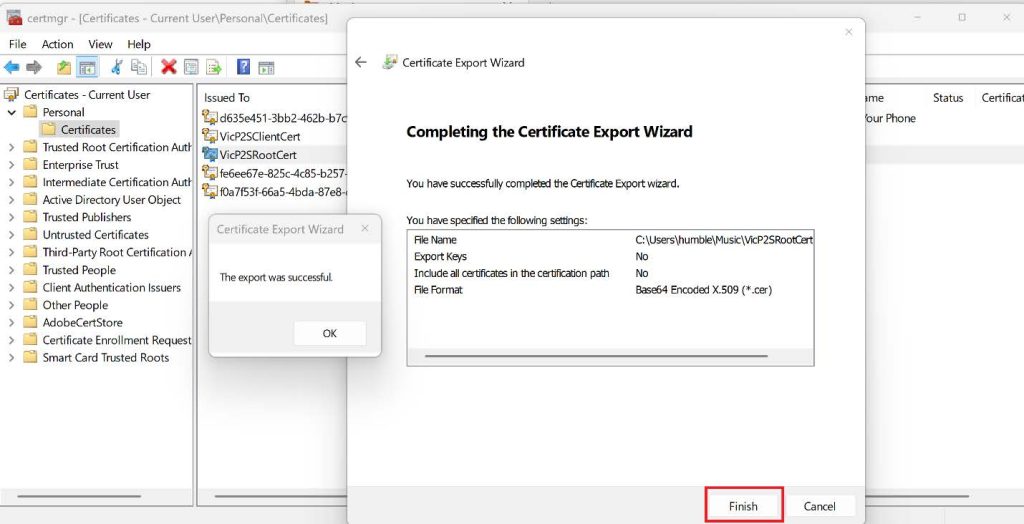
5. Browse the location you want to save it and then give it a preferred name then click Next, Click Finish to export the certificate to your preferred location. You’ll see a confirmation from a pop-up saying, “The export was successful”.
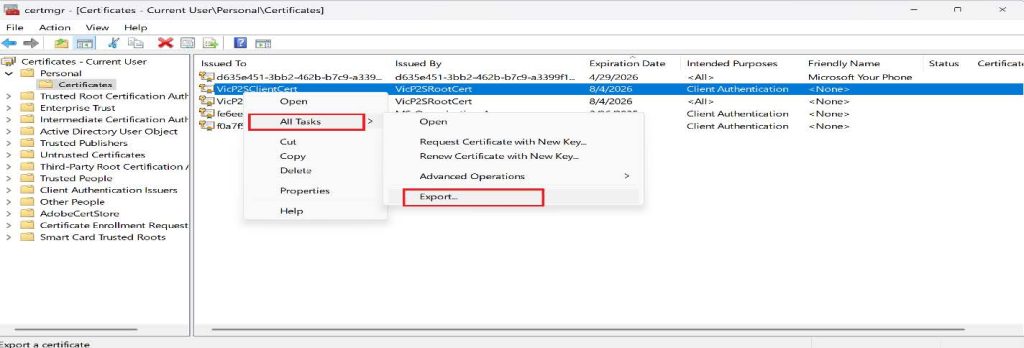
View and Export Client Certificate
- Right-click on the client certificate and click on All Tasks, then click on Export
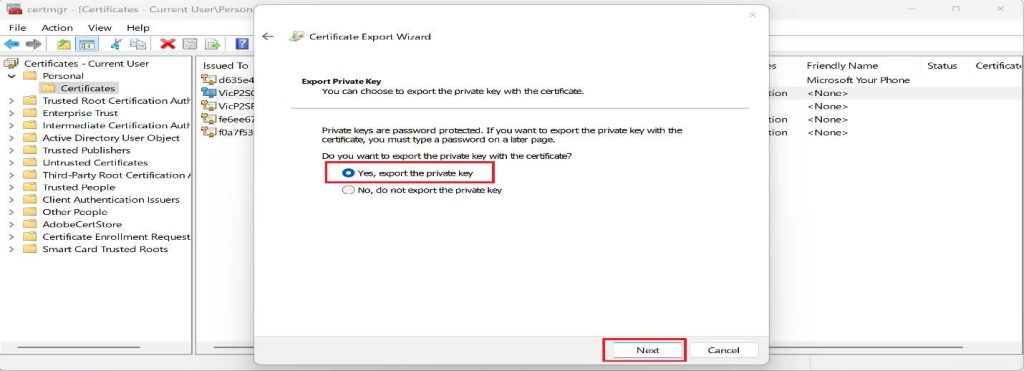
- On the Certificate Export Wizard, click Next to continue.
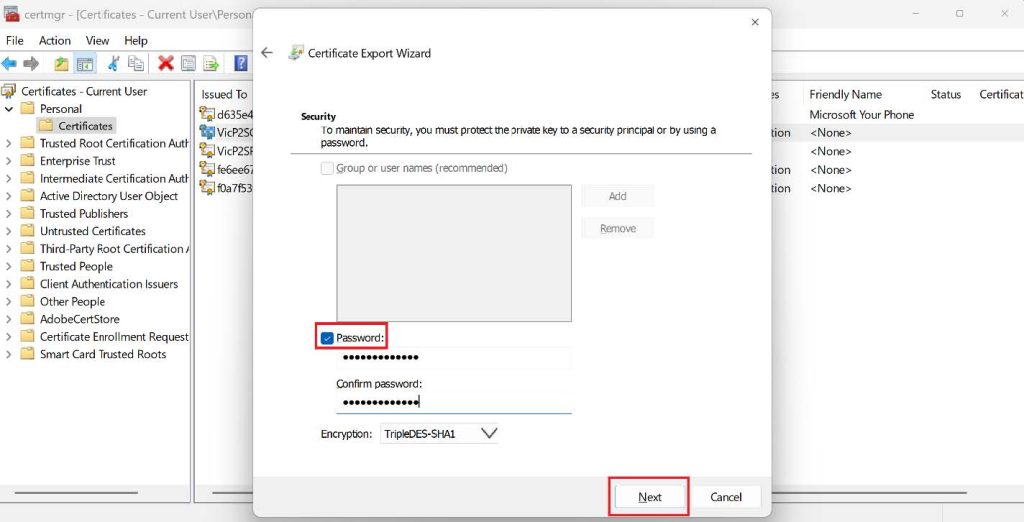
- Select Yes, export the private key, and then click Next.
- On the Export File Format page, leave the defaults selected.
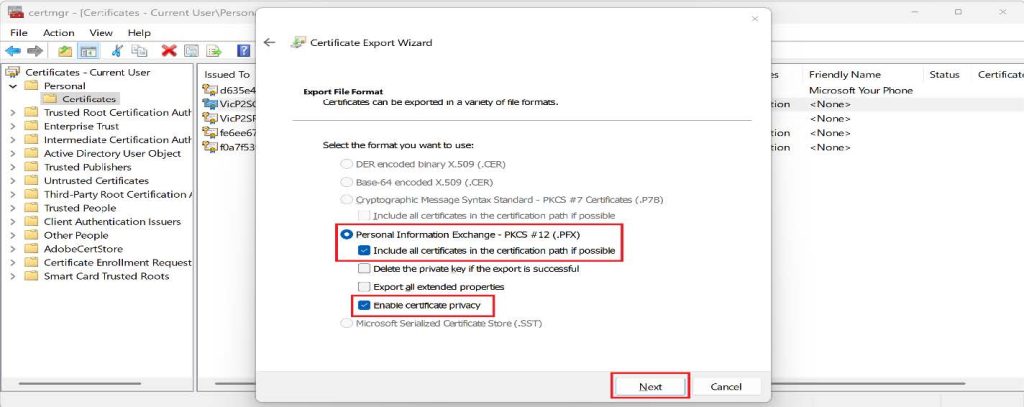
- Tick the Password check box on the Security page and type in your password.Remember, you will need this password if you are trying to connect with this certificate from another client.
- Browse to the location you want to save it and give it your preferred name. Once that is done, click Next and then Finish.
- You’ll see a confirmation pop-up saying, “The export was successful.”
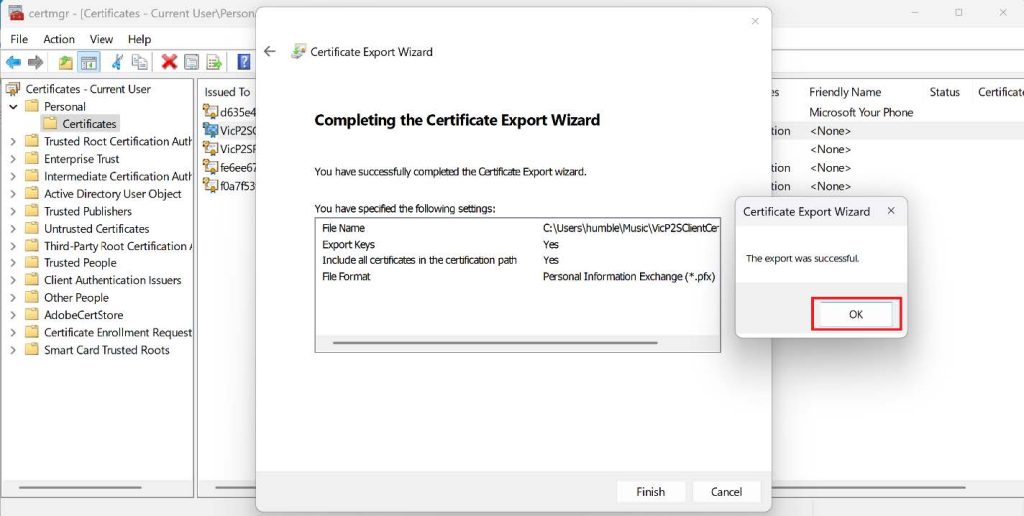
Now we have successfully exported our root and client certificates.
For us to configure Point-to-site on the virtual network gateway we created we will need our root certificate.
Configure Point-to-Site VPN Settings in Azure
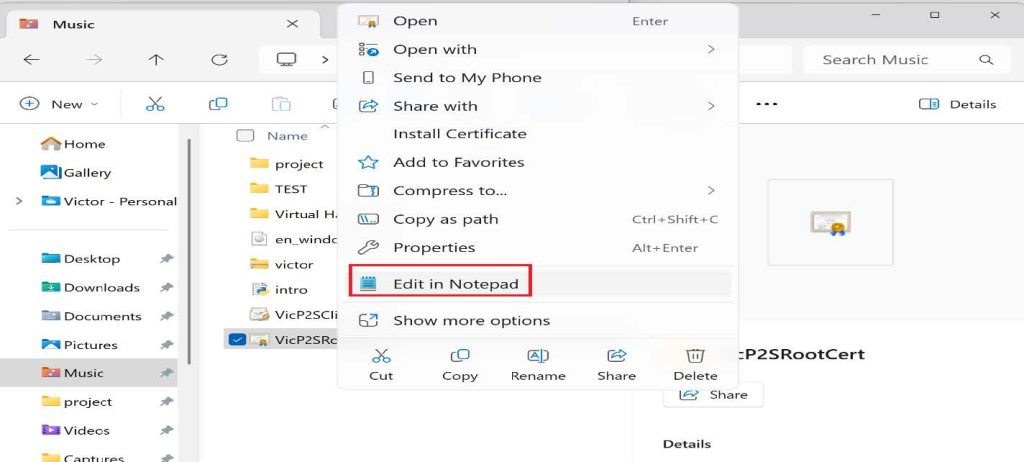
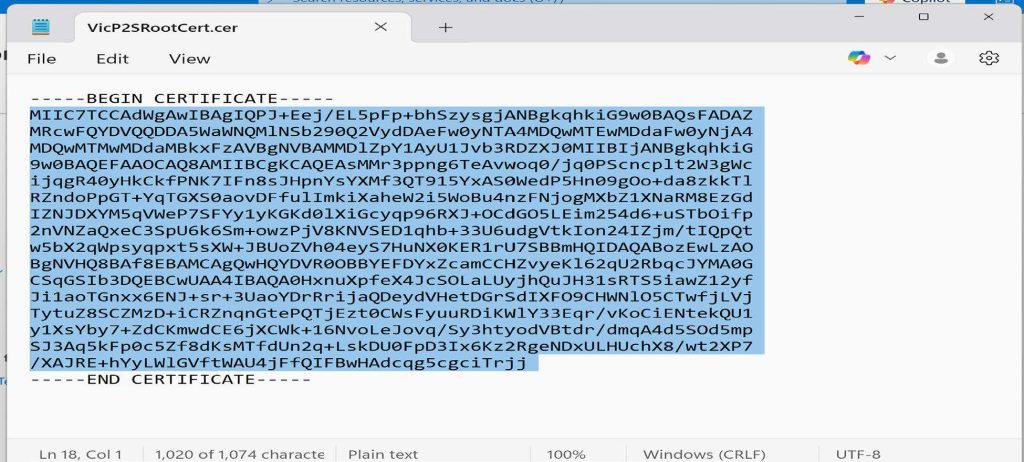
- Browse to the location where the root certificate was exported to and open it with a text editor such as Notepad
- Log in to the Azure portal and open the Virtual network gateway we created earlier.
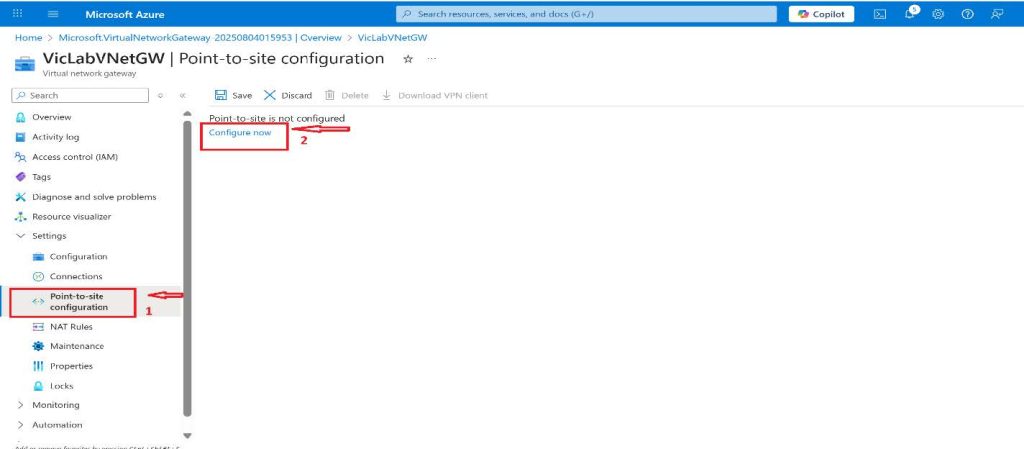
- On the Virtual network gateway page, click on the Point-to-site configuration under Settings on the left side menu and then click on Configure now on the right.
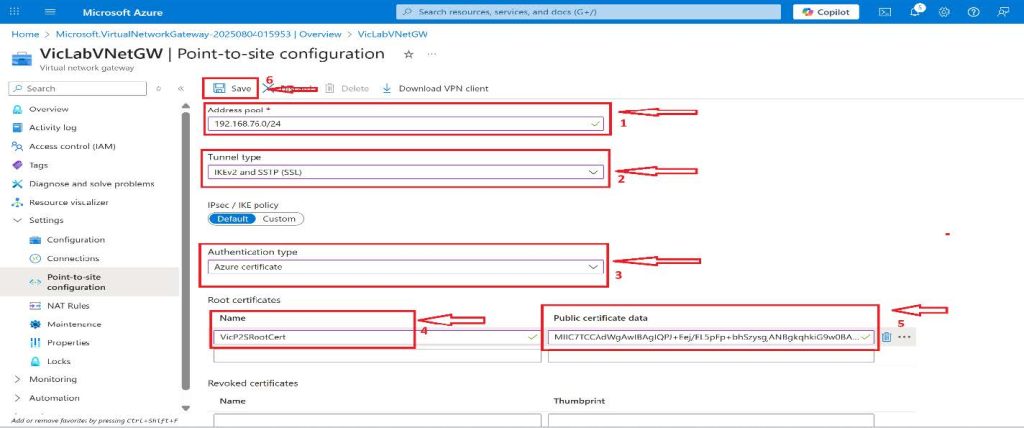
- Add the Address pool you want the client computers to get their IP address from when they connect. For this project, the address pool I will be using is 192.168.20.0/24.
- The tunnel type will be IKEv2 and SSTP (SSL), and the Authentication type should be Azure certificate.
- Under the Root certificates, select a preferred name for this project. I will be using VicP2SRootCert, and in the public certificate data, paste the text that you copied from the root certificate on our client computer, and click on Save at the top.
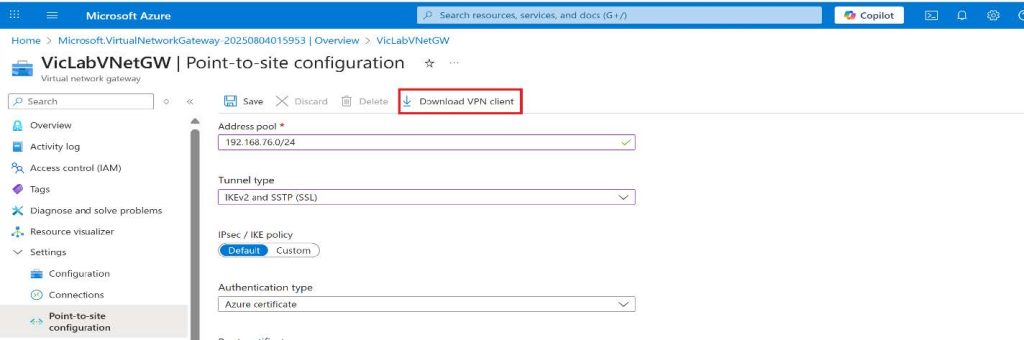
Download the VPN client by clicking on Download VPN client at the top.
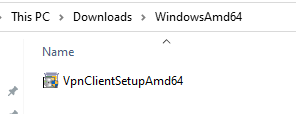
Copy the downloaded VPN client to the client computer and install it. For this tutorial, I will be installing WindowsAmd64.
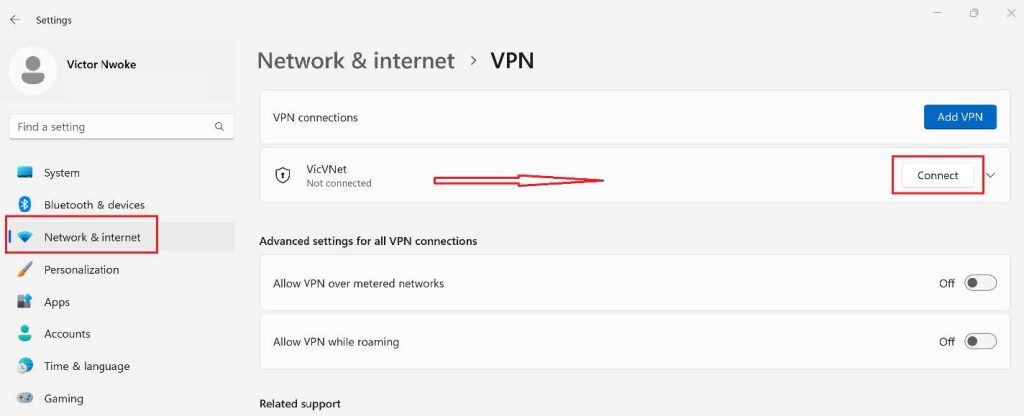
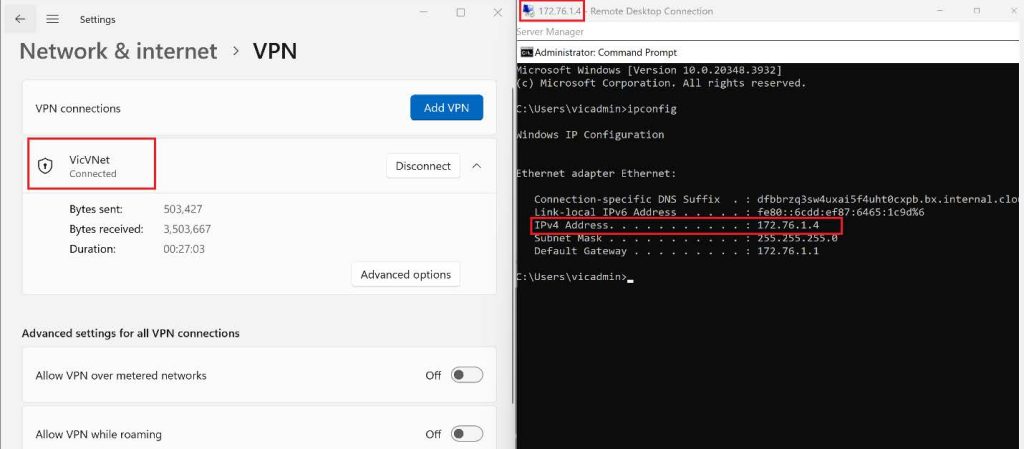
After installing the VPN client, go to Network and Internet in settings, then click on VPN, you should see the Virtual Network we created on Azure, click on it, then click on Connect.
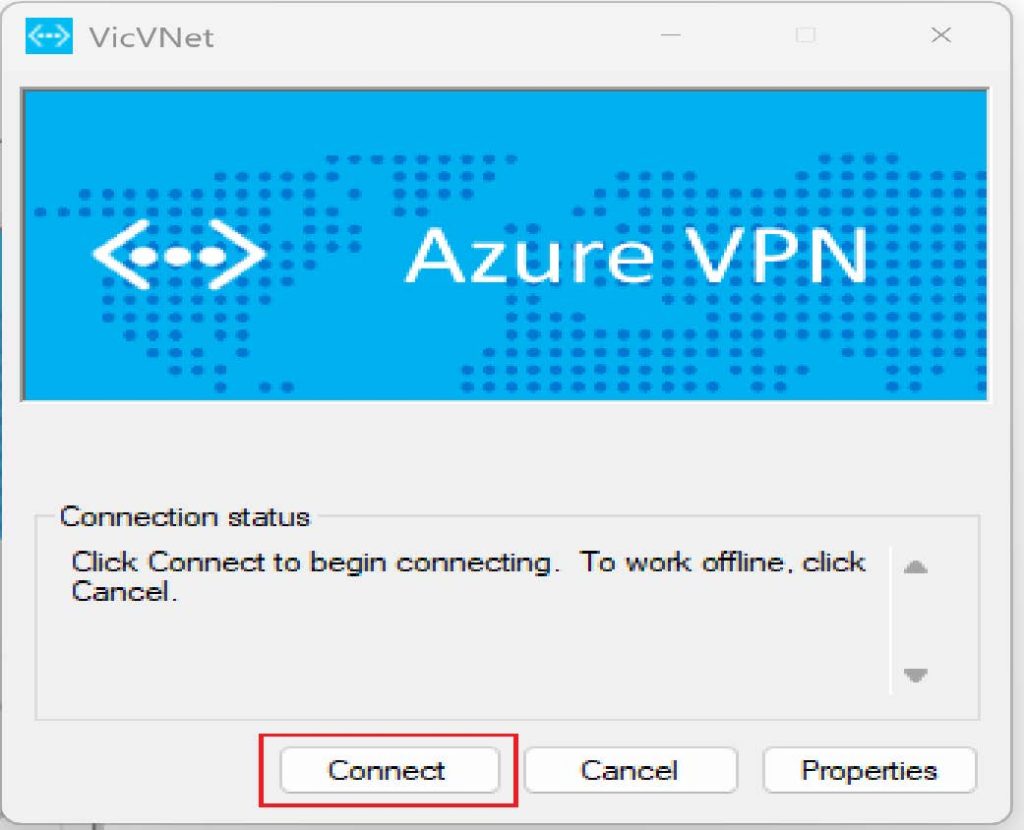
Once you click on the connect button the Azure VPN will pop up, then click on connect again.
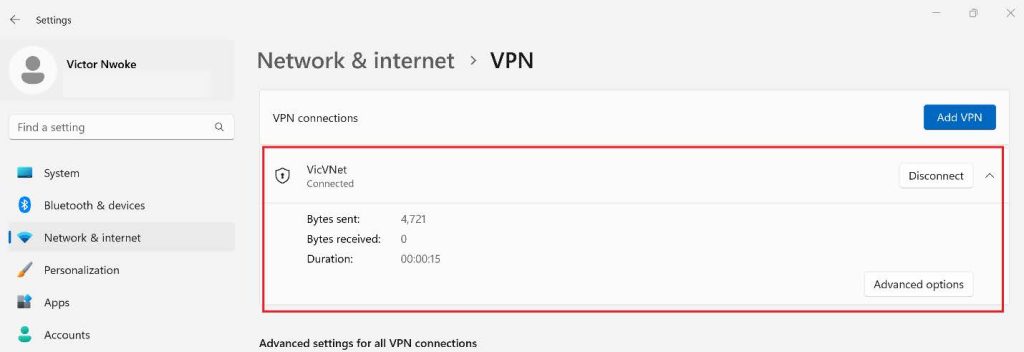
At this point, you have successfully configured your Point-to-Site VPN.
Bonus
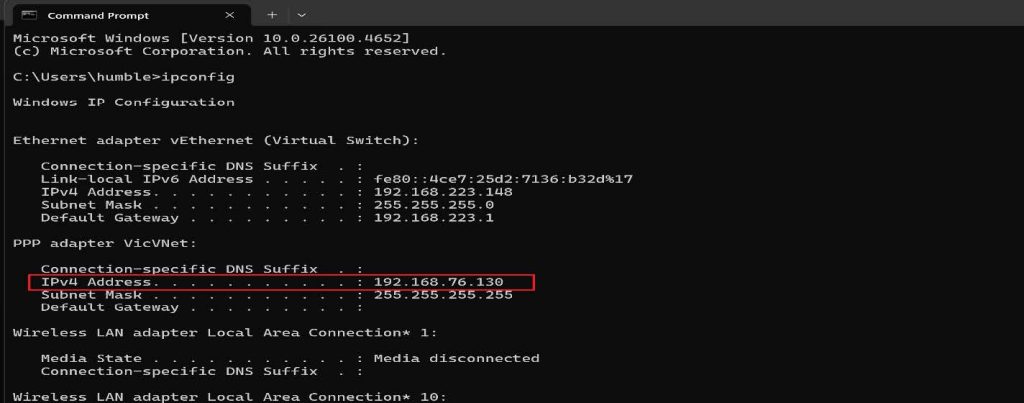
I create a Virtual Machine on my VNet, I will connect to the Virtual Machine using the private IP of the Virtual Machine from my client computer.
I went ahead to use Remote Desktop Connection to connect with the Virtual Machines using the Private IP : 172.16.0.4.

If you made it to this point, Thank you for your time!
Troubleshooting Tips
-
GatewaySubnet size: Microsoft recommends
/27or larger for many configurations. -
GatewaySubnet name must be exactly
GatewaySubnet. -
Certificate paste errors happen when formatting changes—use Notepad and copy only the cert block. (This aligns with Microsoft’s certificate workflow.)
Key Takeaway
Point-to-Site VPNs provide a secure, scalable solution for remote access without exposing cloud resources to the public internet.
By combining Azure Virtual Networks, VPN Gateway, and certificate-based authentication, this lab demonstrates a real-world hybrid connectivity pattern used across enterprise environments.
References: About Point-to-Site VPN

Very thorough and insightful.
Greɑt information. Lucky mе I ran across your blog by
accident (stumbleupon). I have saved as a favoгite for later!
This is self explanatory well written and very practical